Note: these instructions require expertise in soldering and using a solder pot. Do not proceed if you are not already familiar with these processes.
You will need
- Gloves
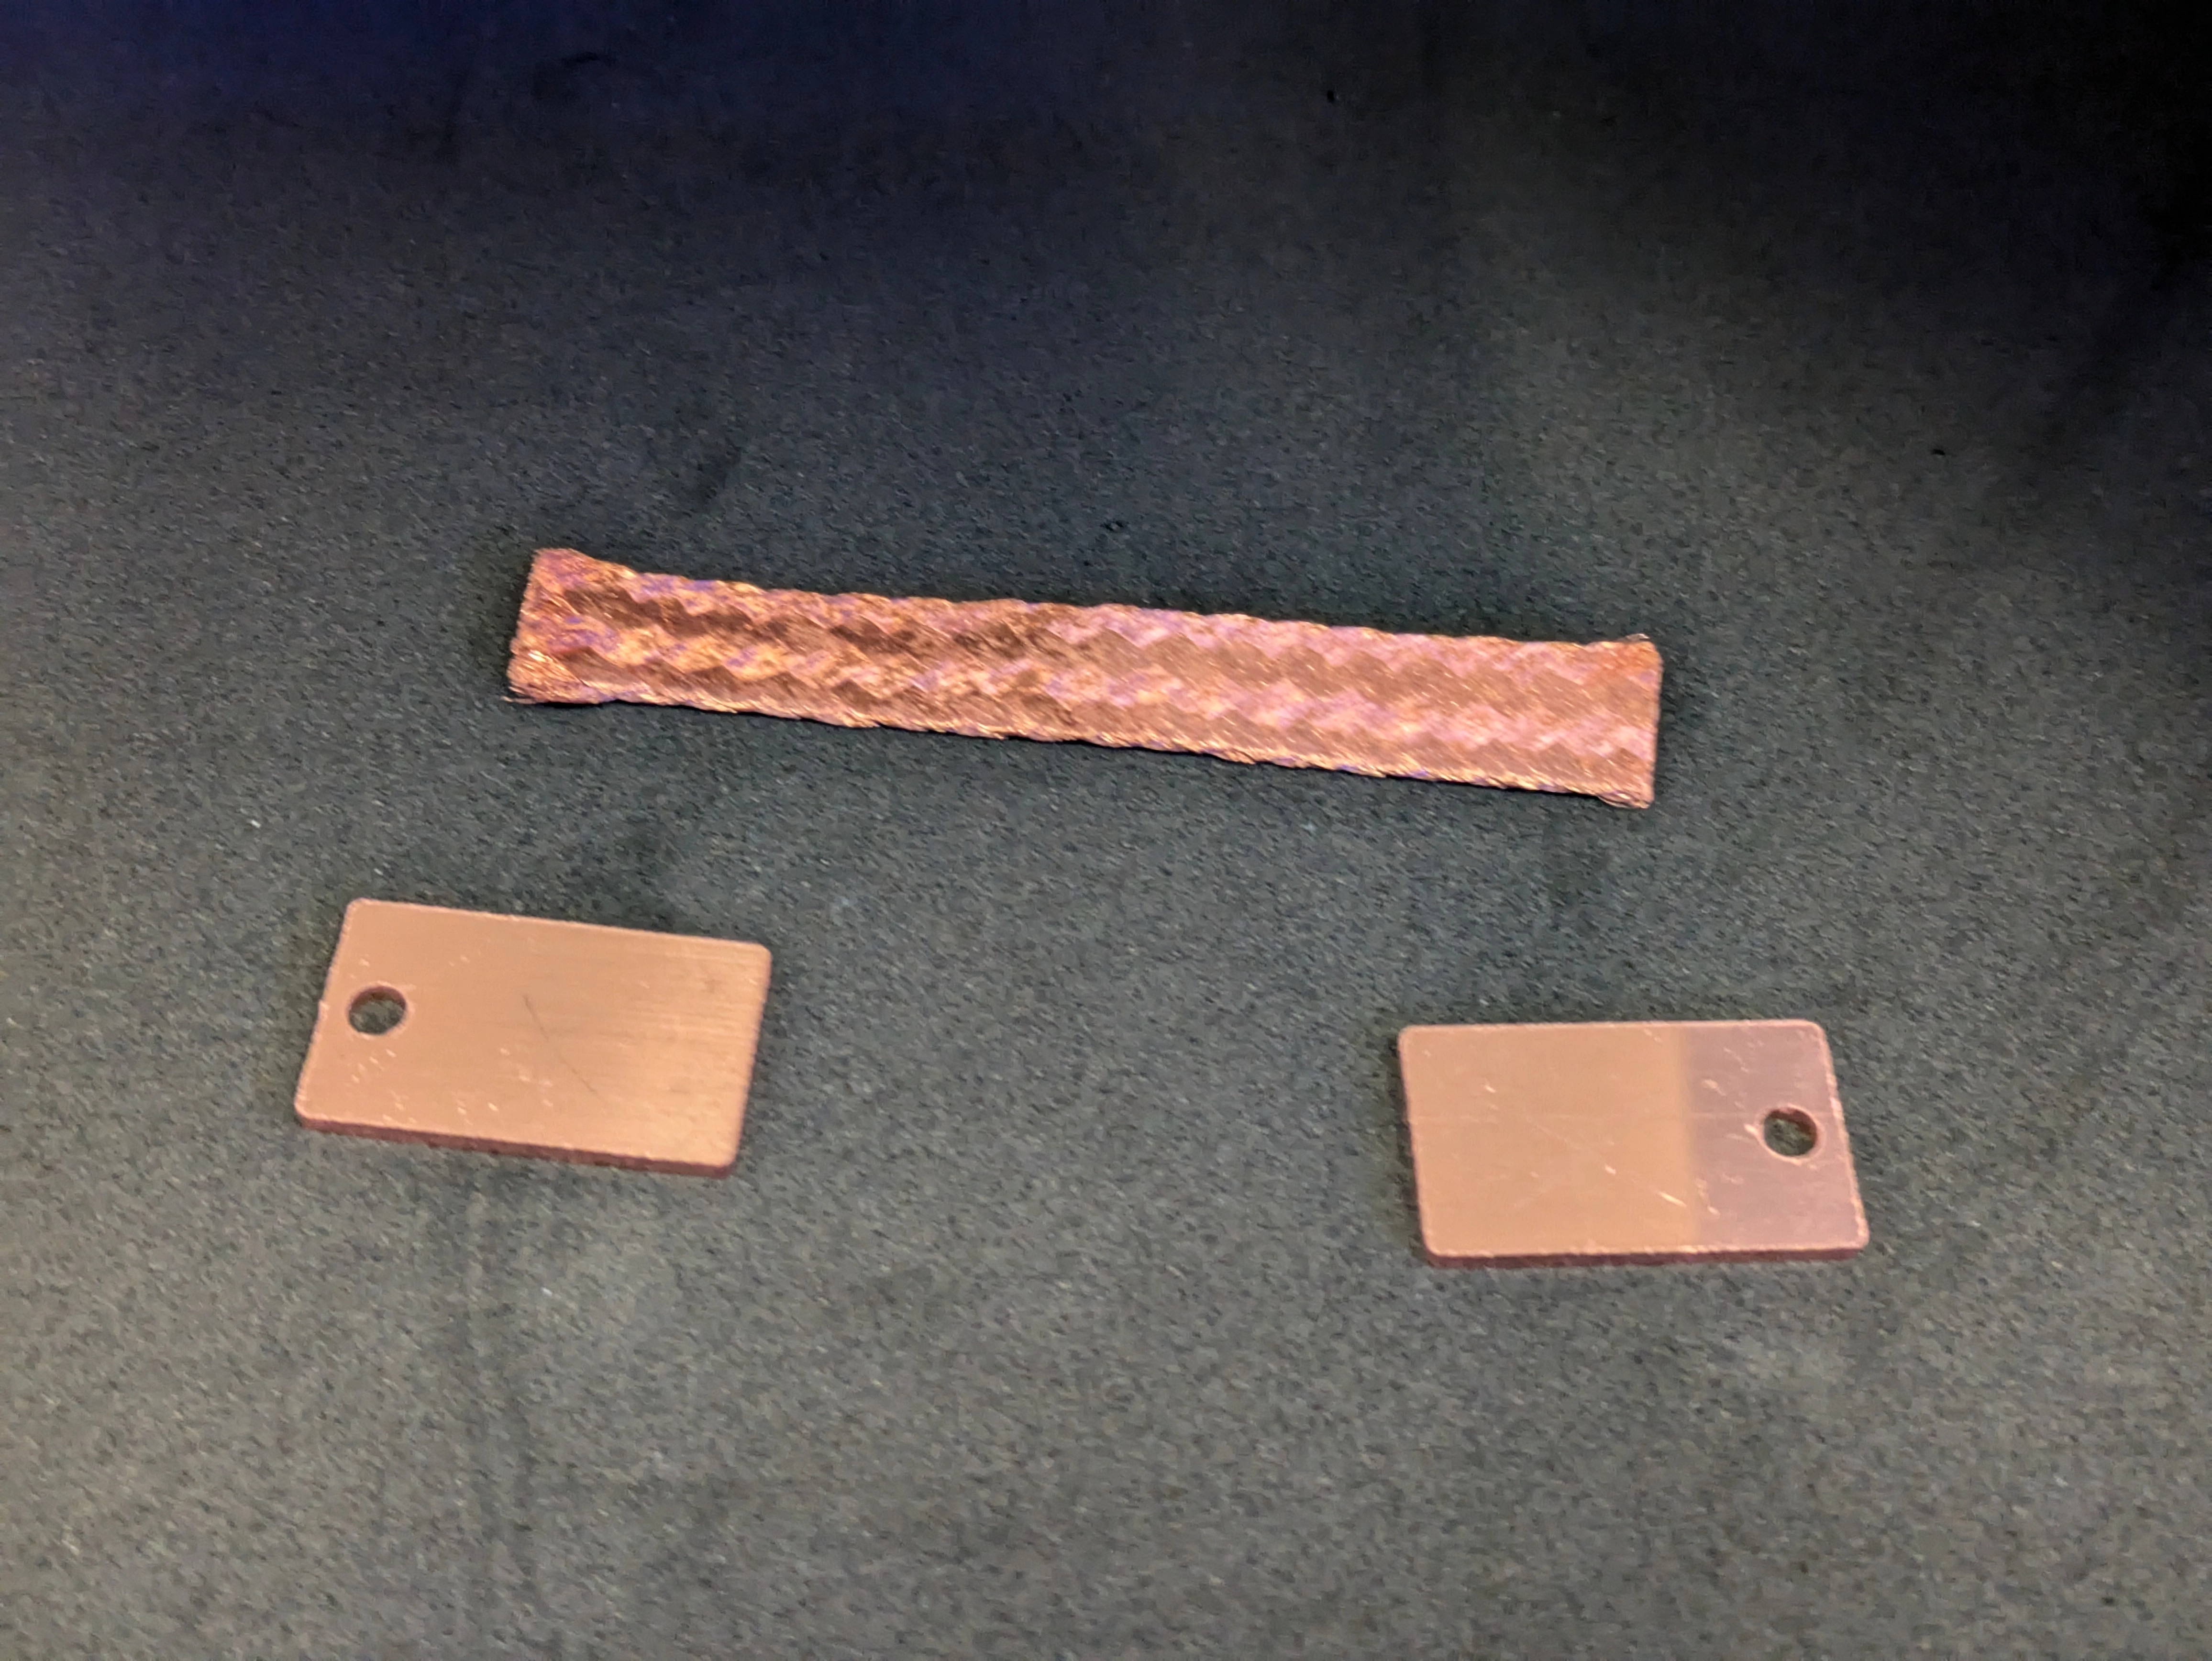
- OFHC flat copper braid
- 2x flat copper terminations
- We used OSHCUT’s CU101 @ 0.062” thickness
- Plate is 15mm x 25 mm with a 4-40 clearance hole
- copper_strap_plate.dxf
- We used OSHCUT’s CU101 @ 0.062” thickness
- Water-washable paste flux
- Here we use Chipquik CQ4300 No-Clean Water Washable Paste Flux
- Polyimide tape
- The tape should be wider than your terminations
- Channel lock pliers
- Should be about as wide as the copper braid
- Soldering materials
- Fume hood + protective gear
- 1 lb lead-free tin-silver solder (94% Sn / 6% Ag)
- Solder pot
- Optional: Water + citric acid solution (5% citric acid by weight)
Instructions
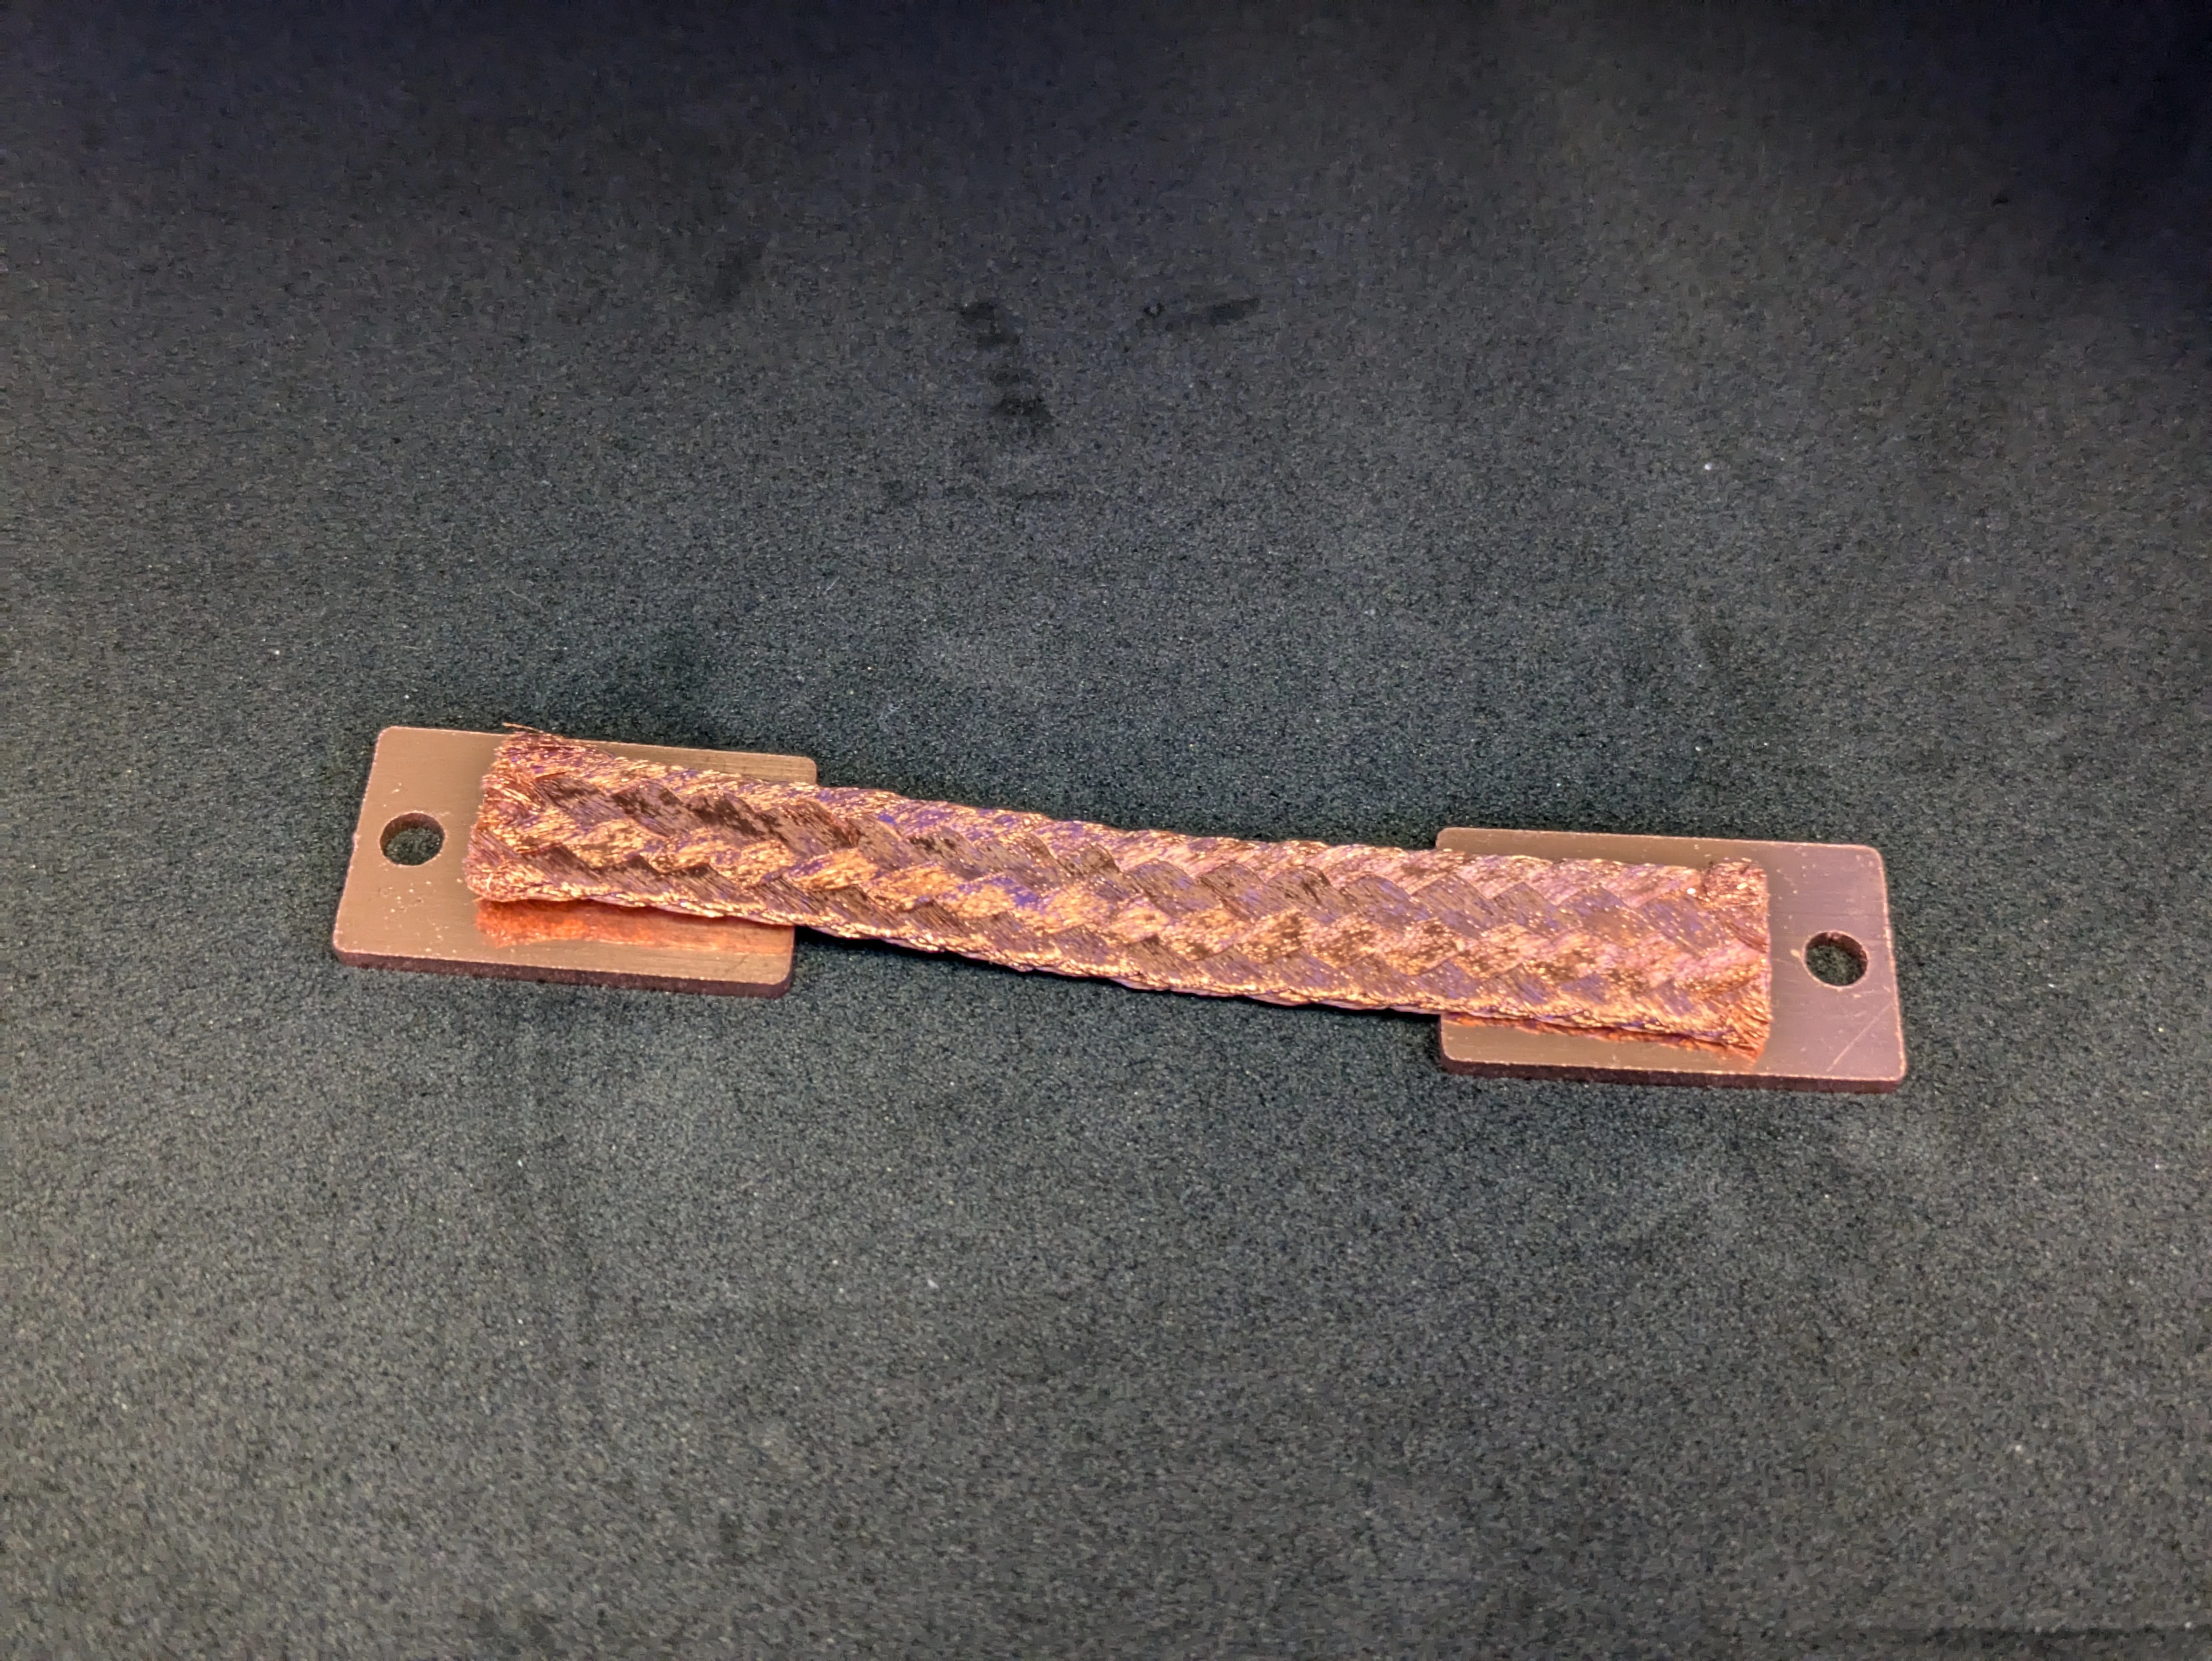
- Begin by getting your pieces together. Your copper braid should be long enough to cover 2/3rds of the terminations
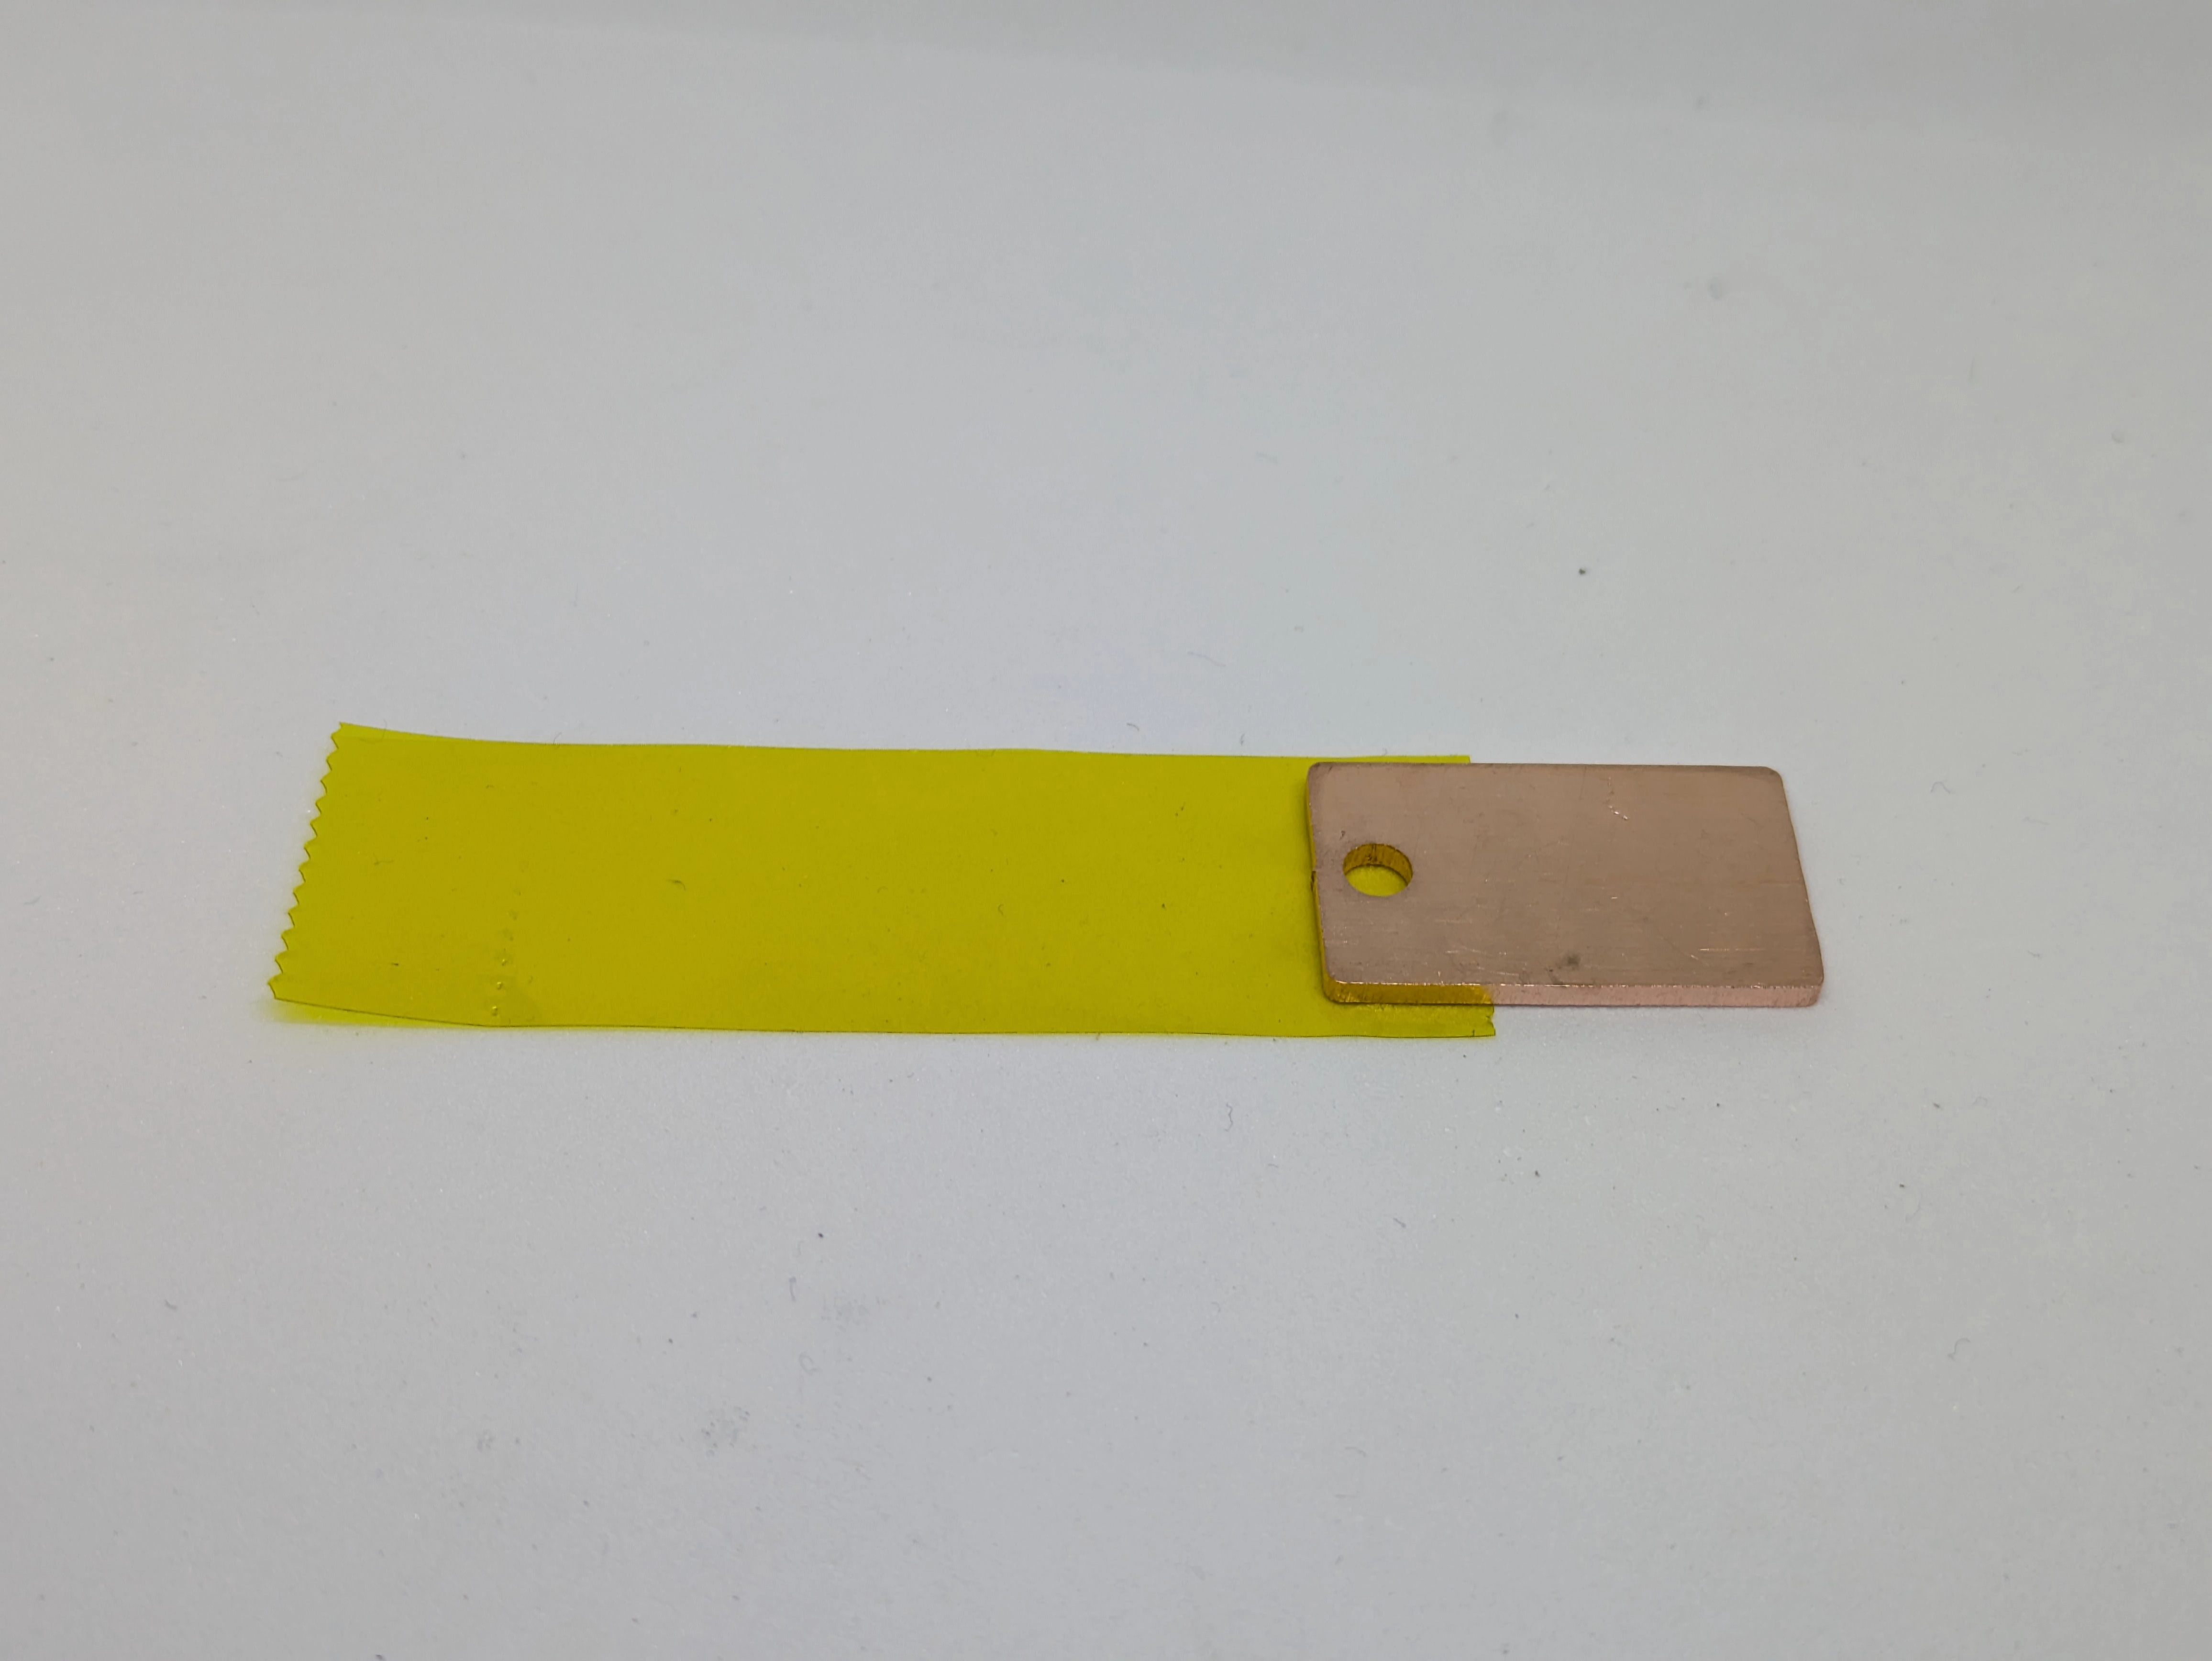
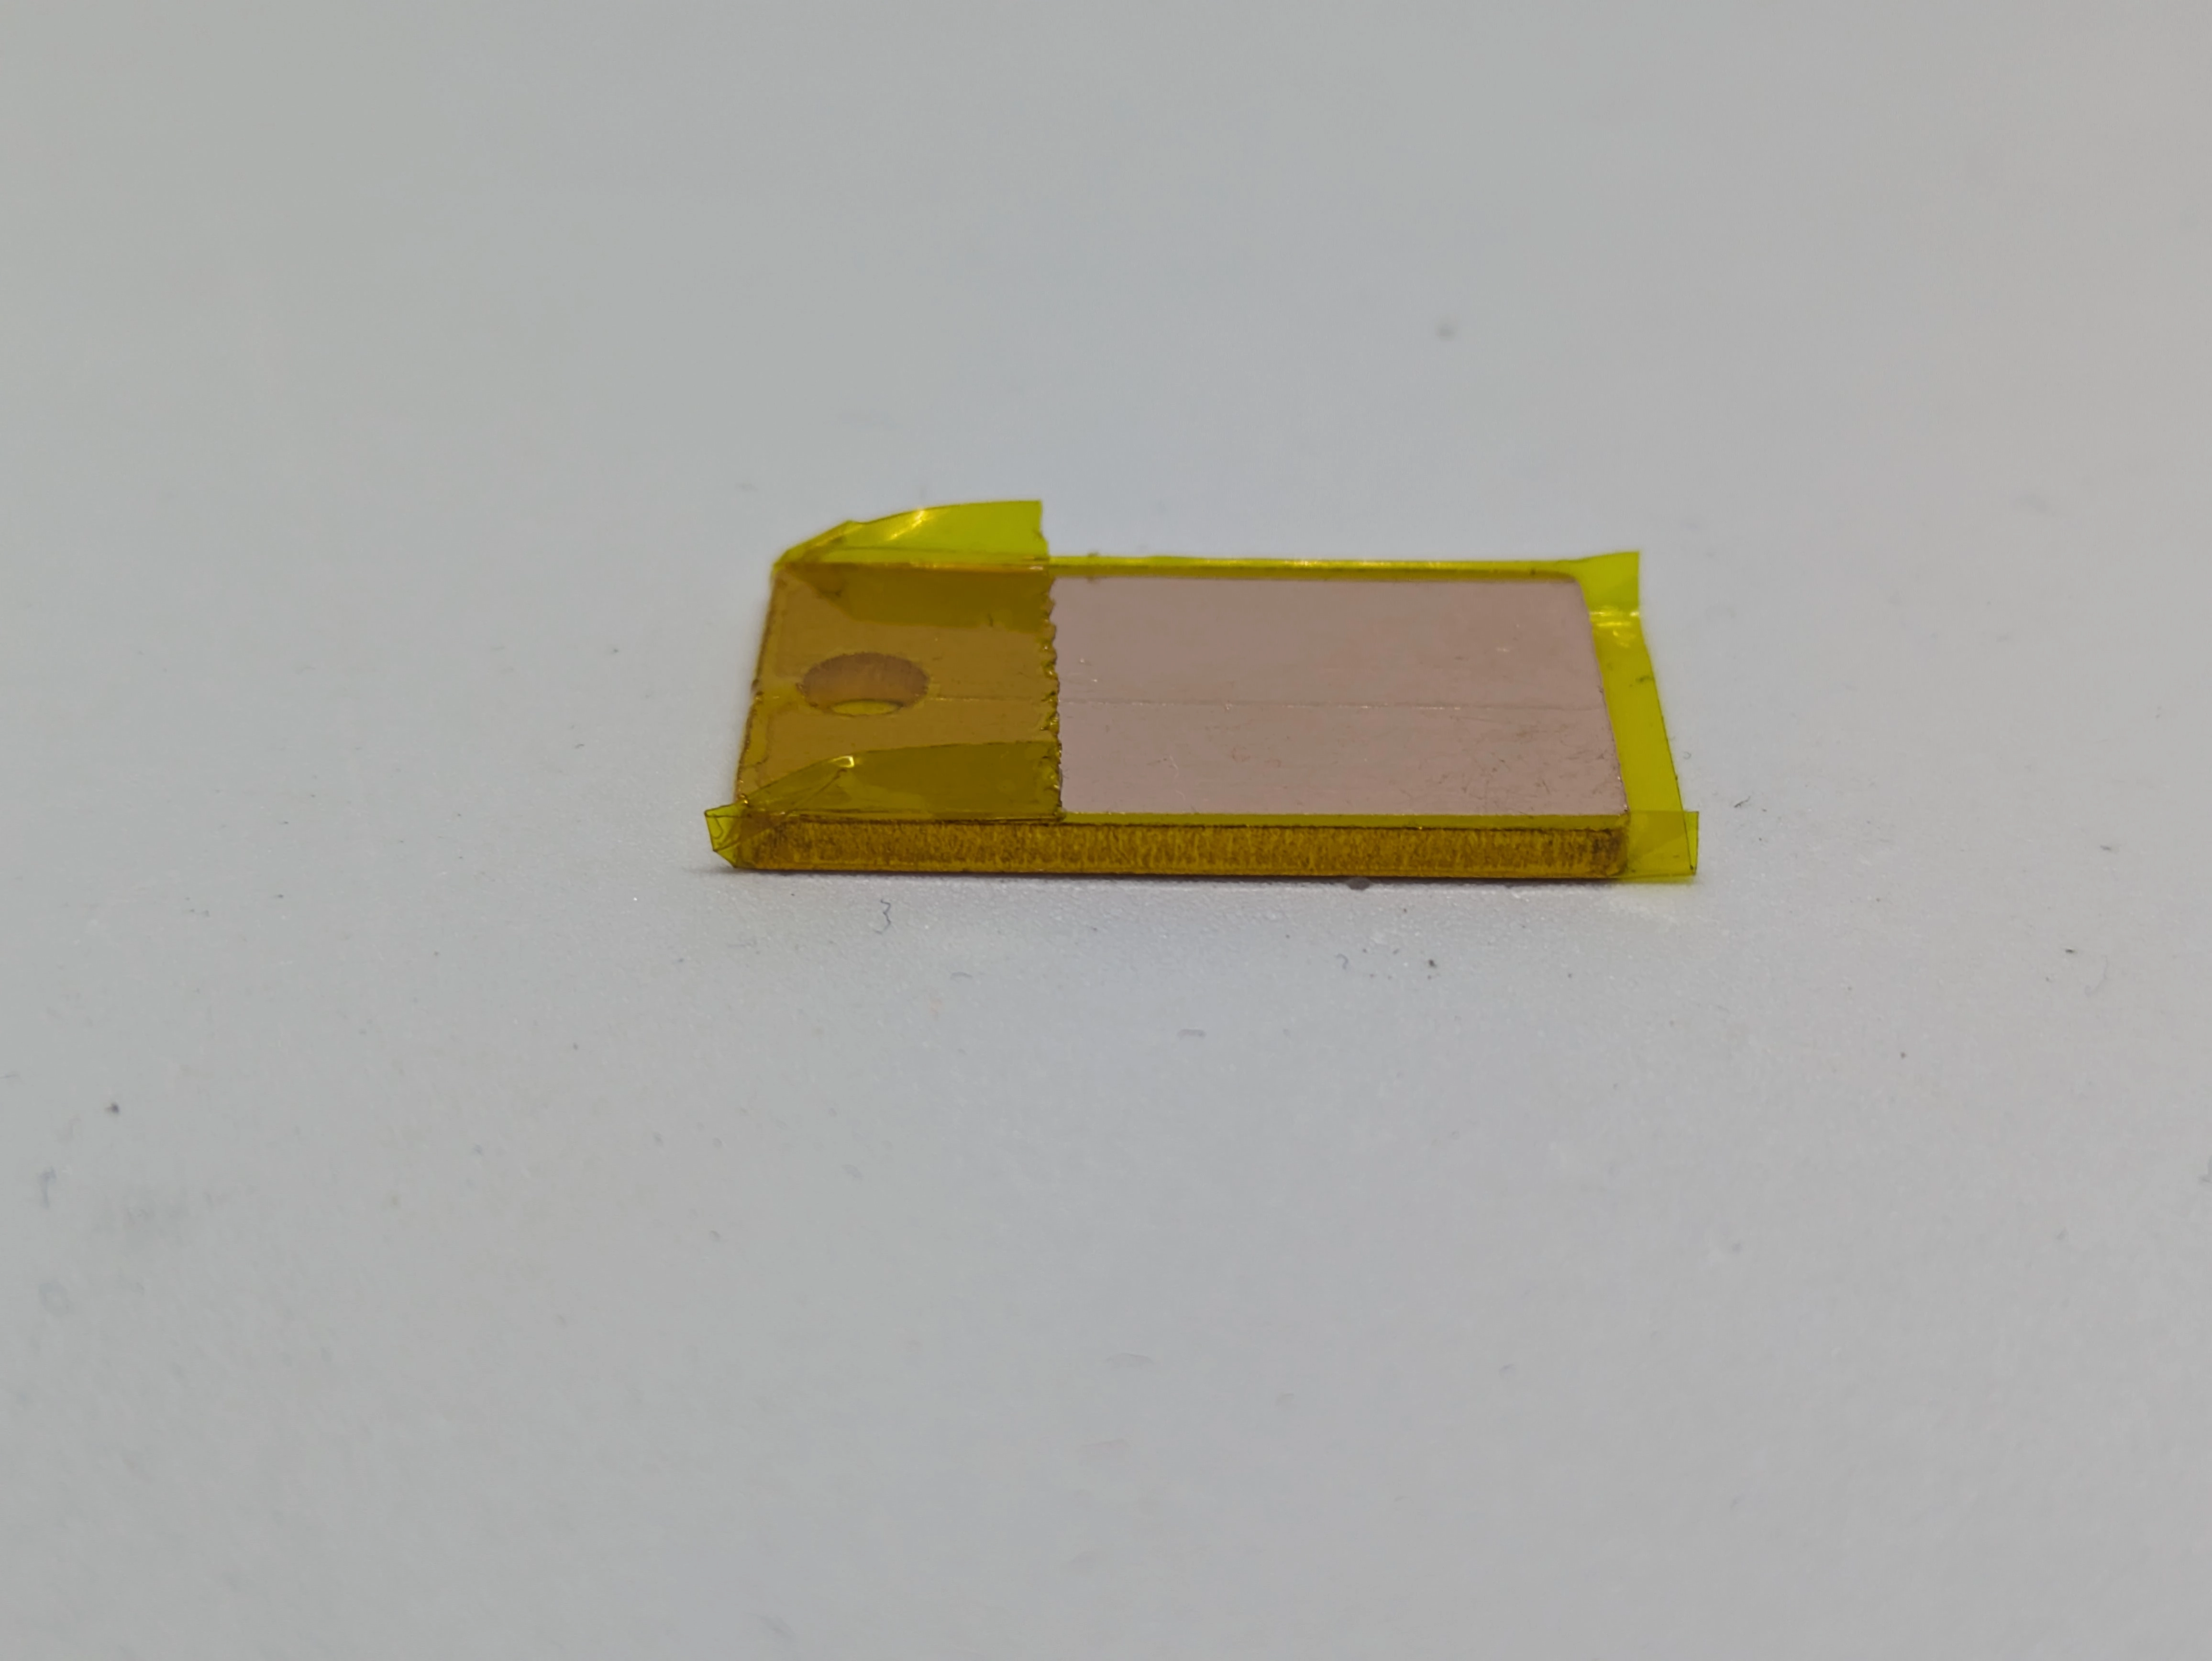
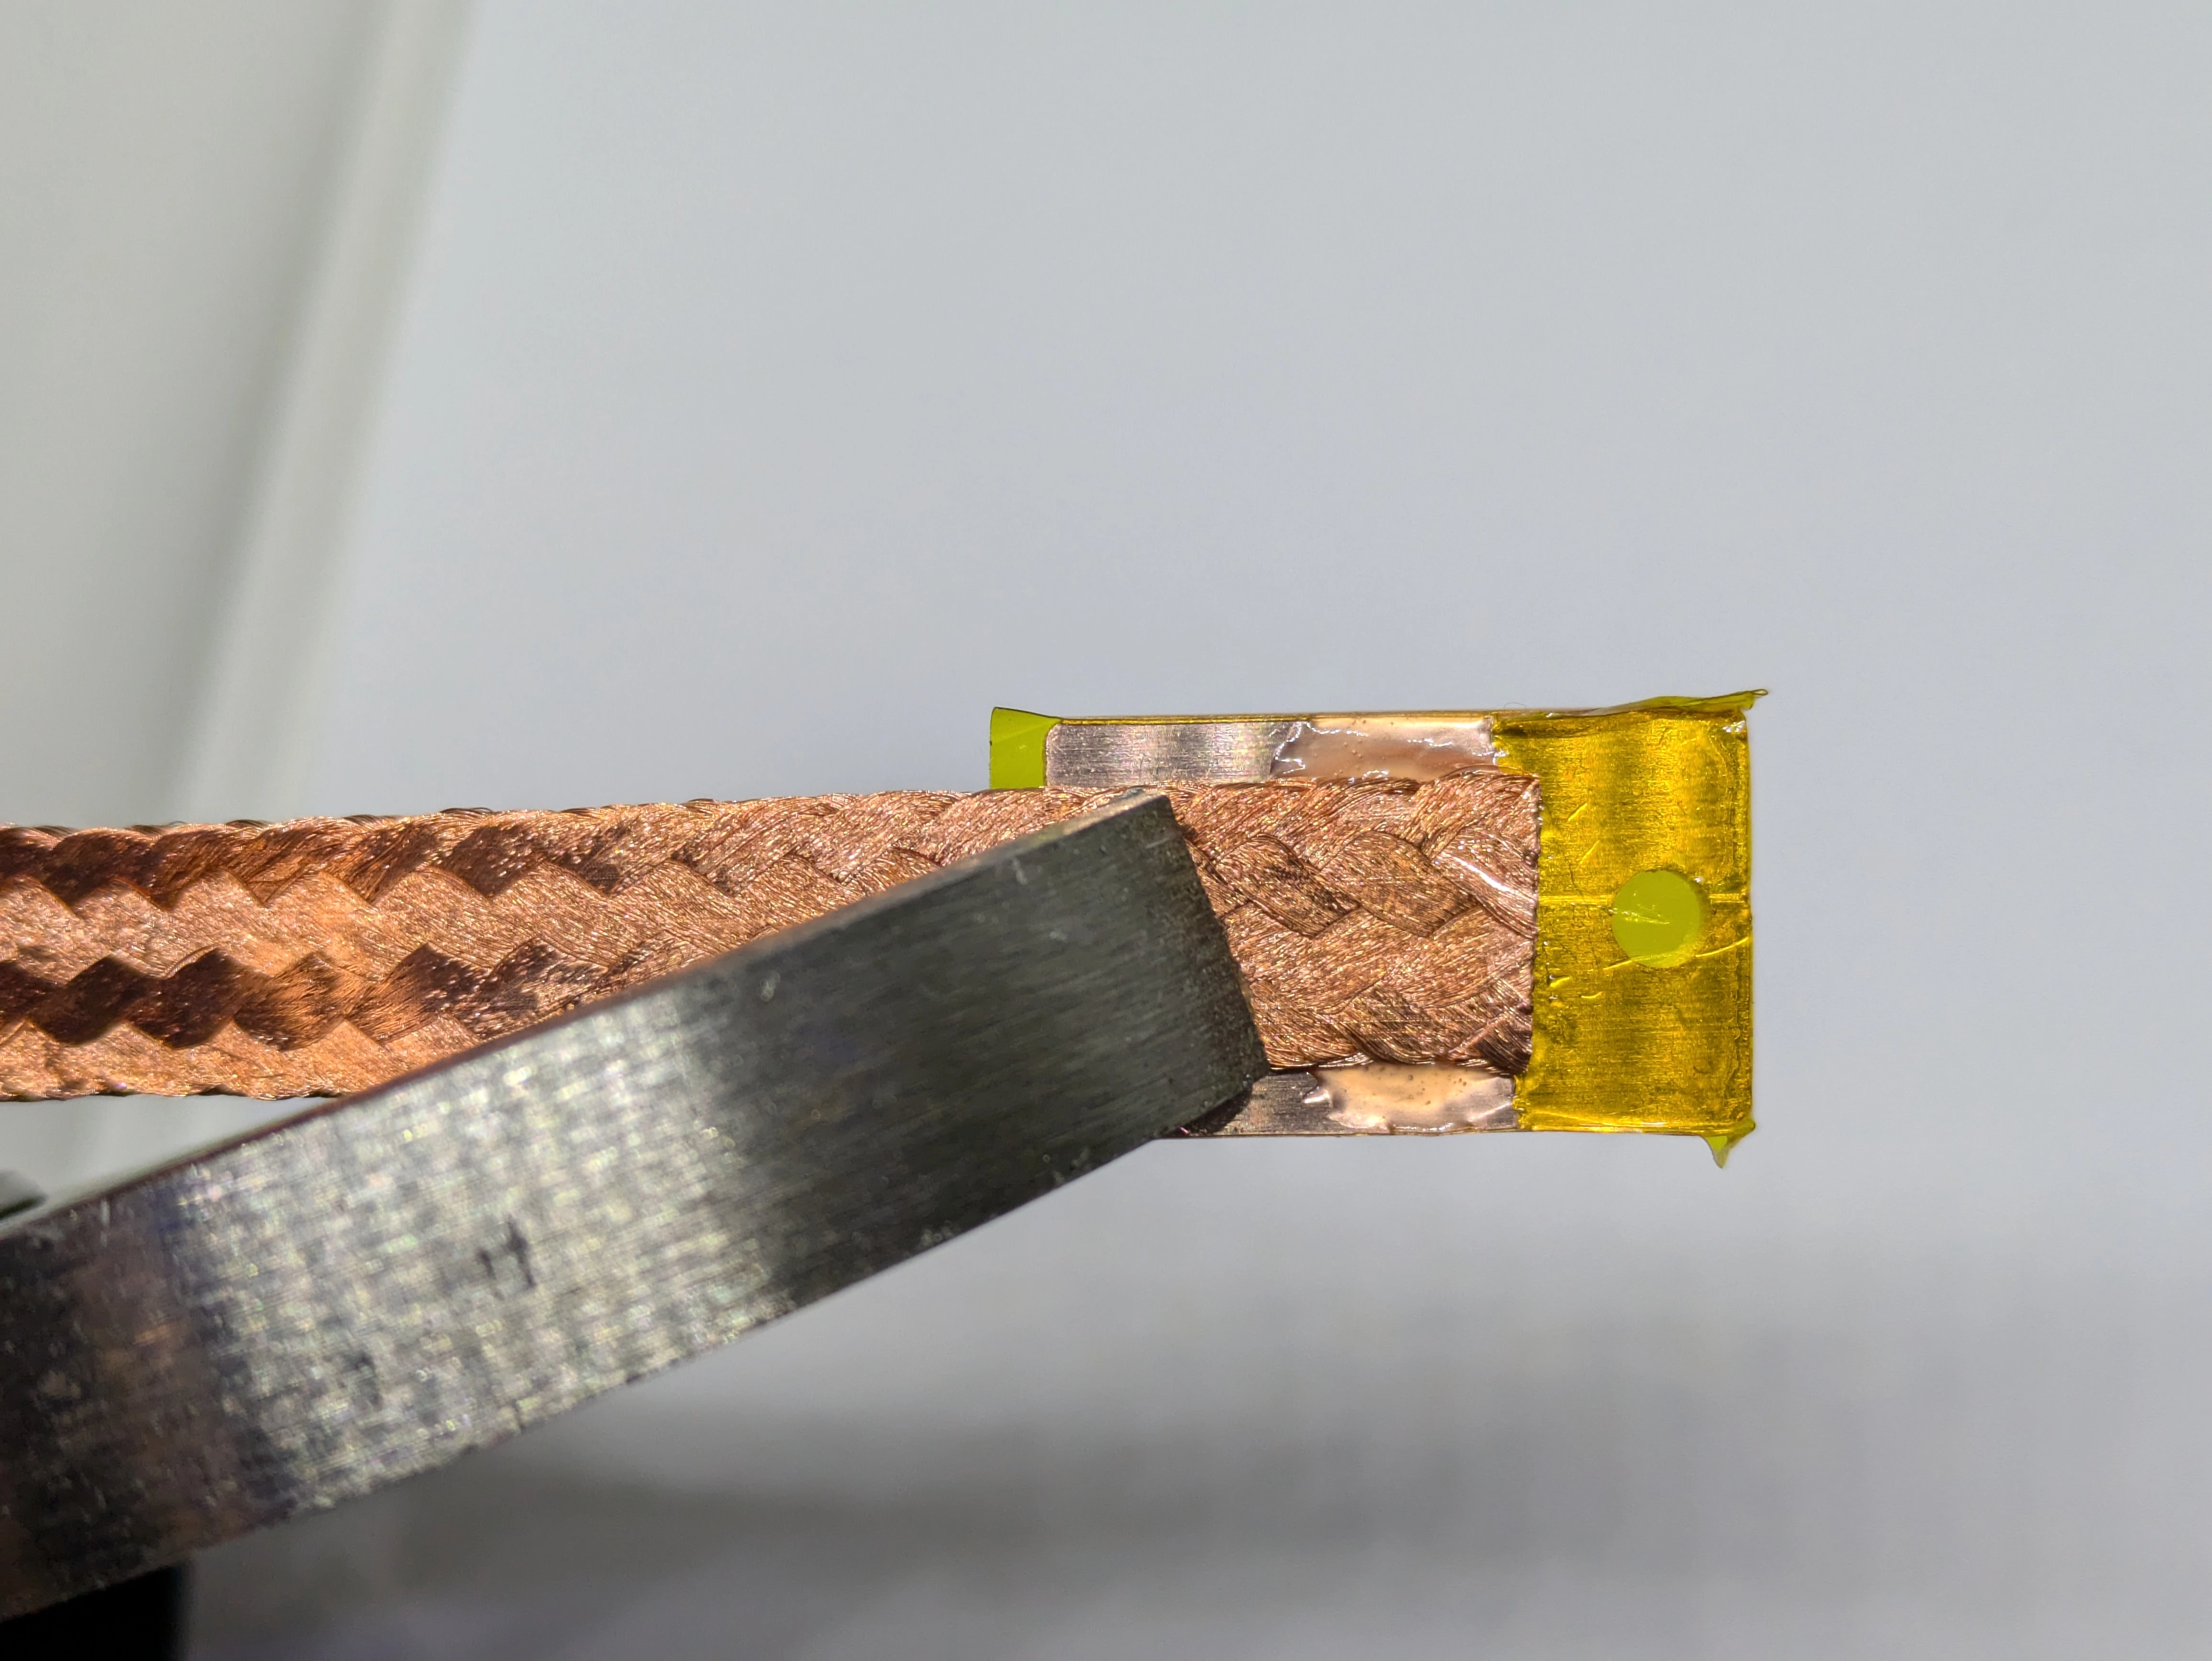
- Apply polyimide tape to the terminations. Your goal is to protect most of the termination from accidentally getting solder on it, only exposing the area where the braid meets the termination
- Start by covering the through-hole on one side of the termination
- Then wrap the tape around and cover the entirety of the other side
- Cut off any extra tape hanging off the end
- Lastly, fold the excess tape up the sides of the terminations to cover them
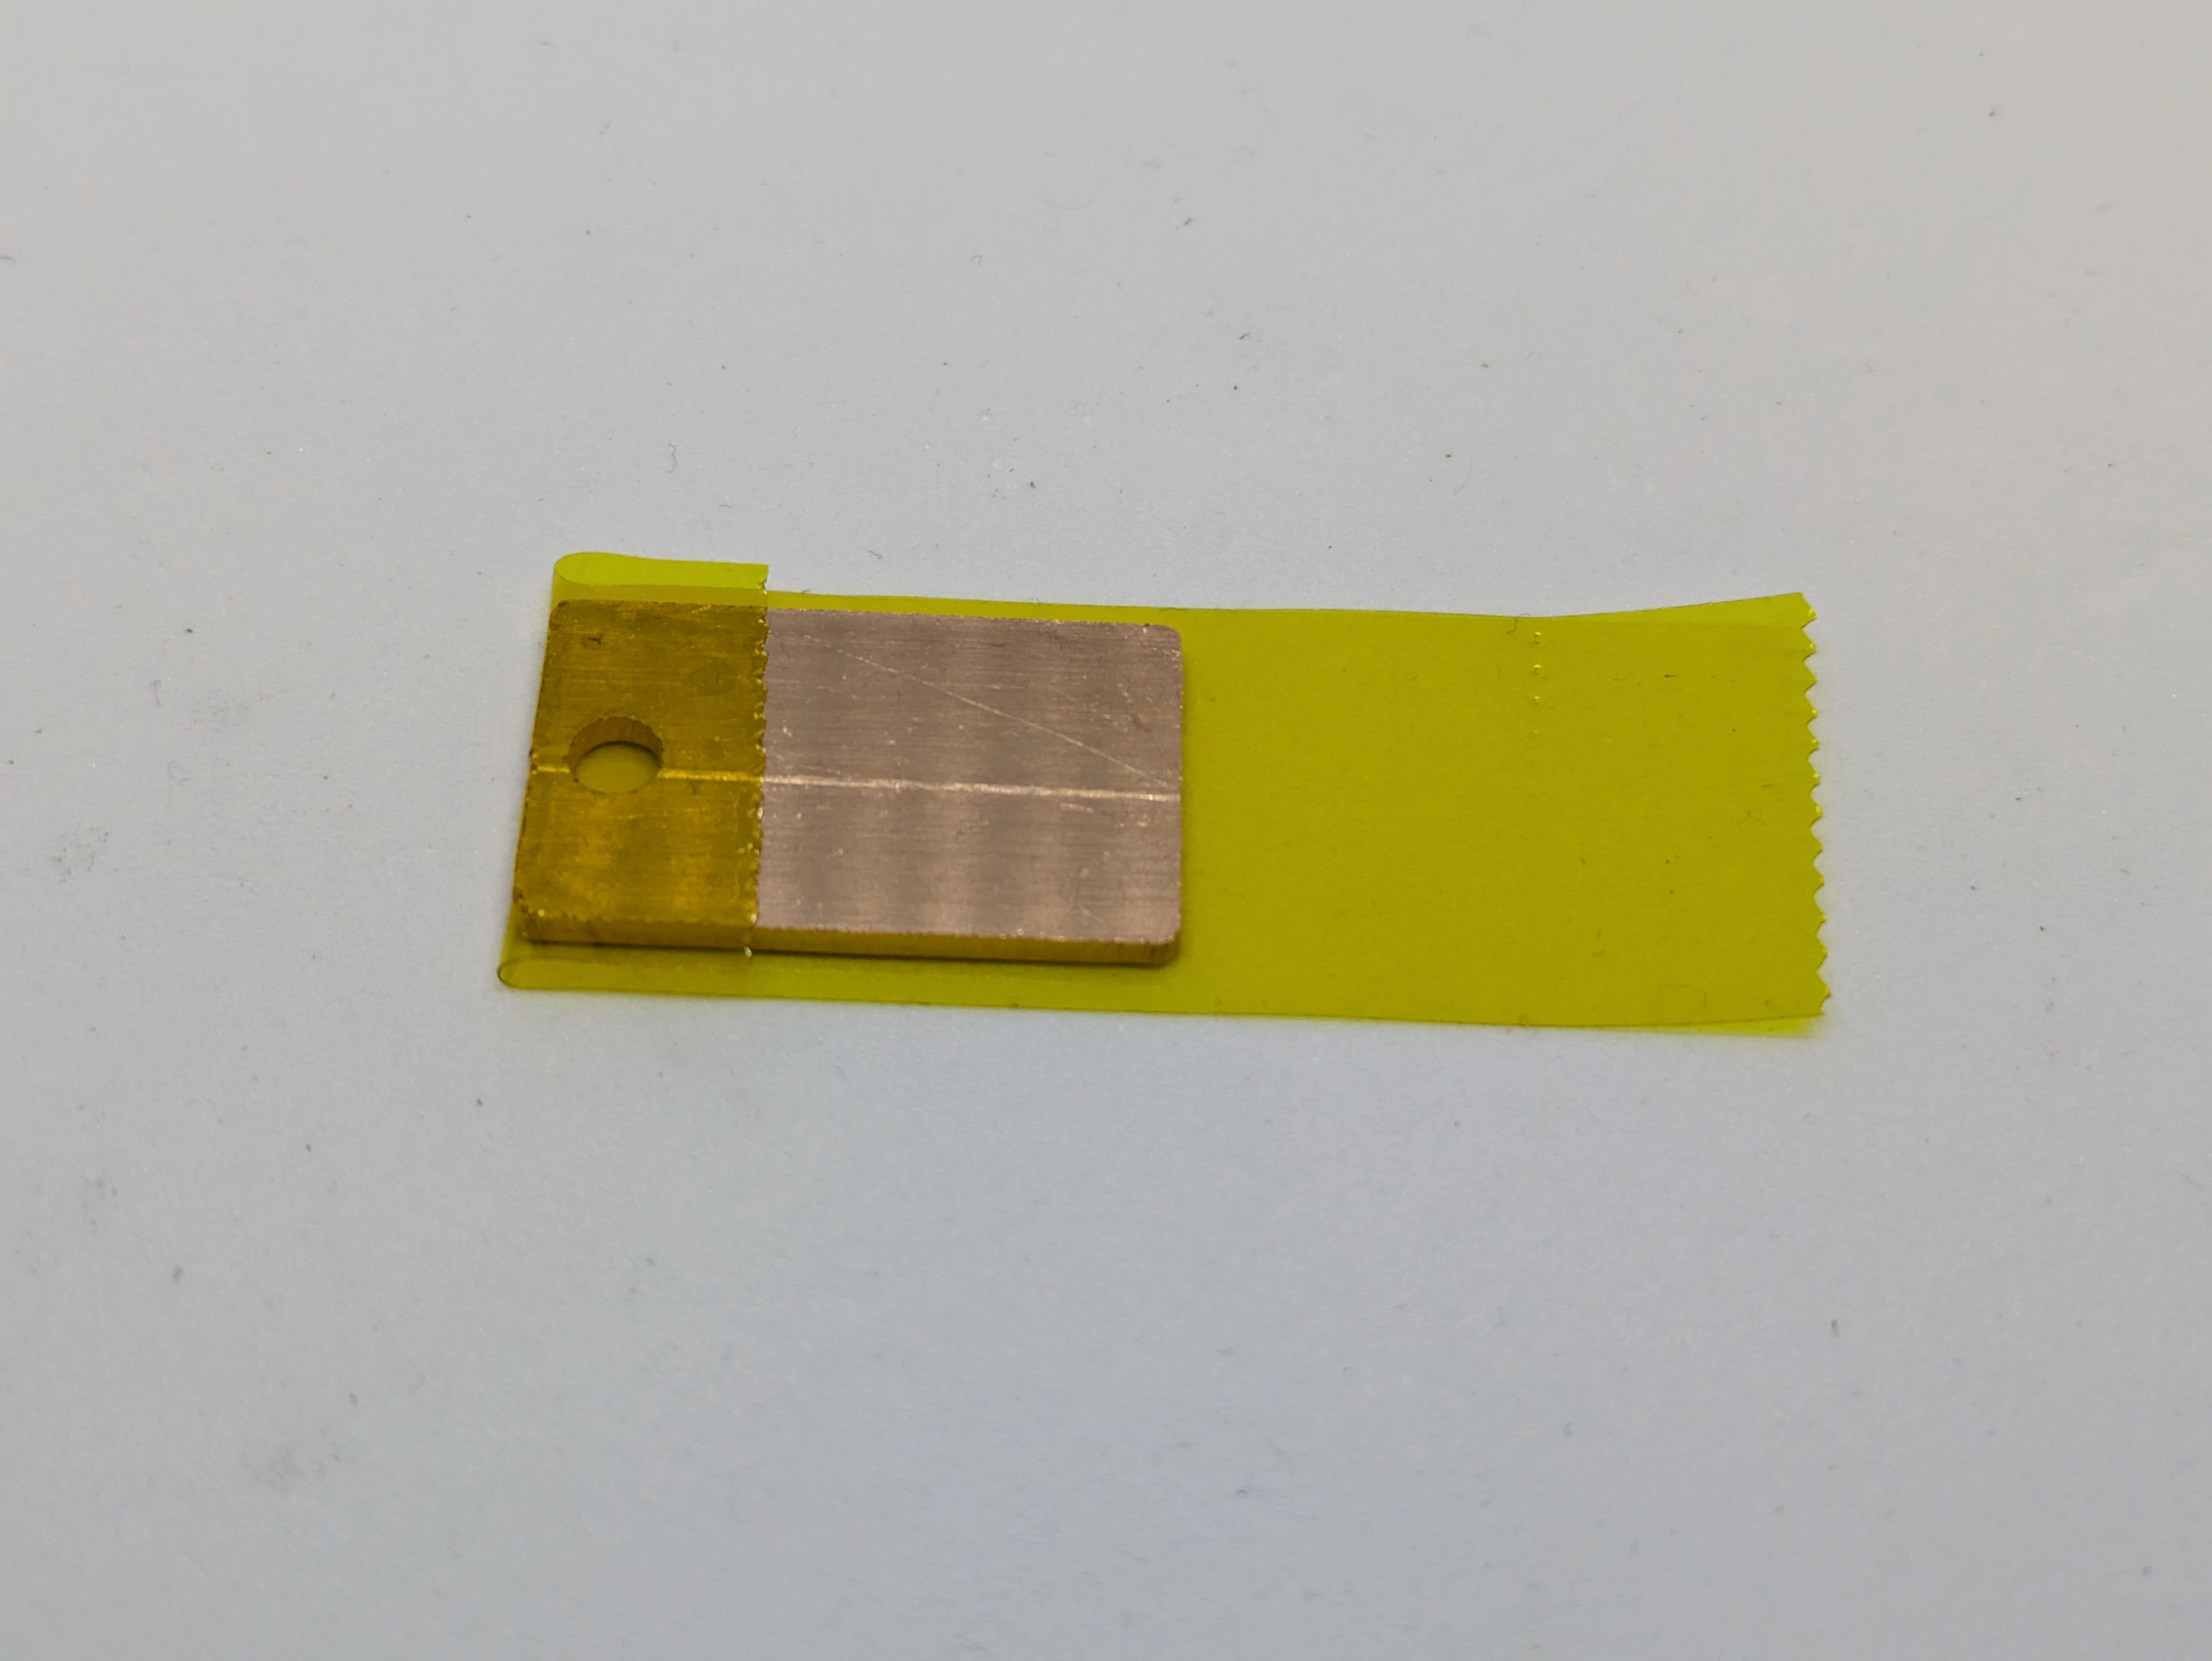
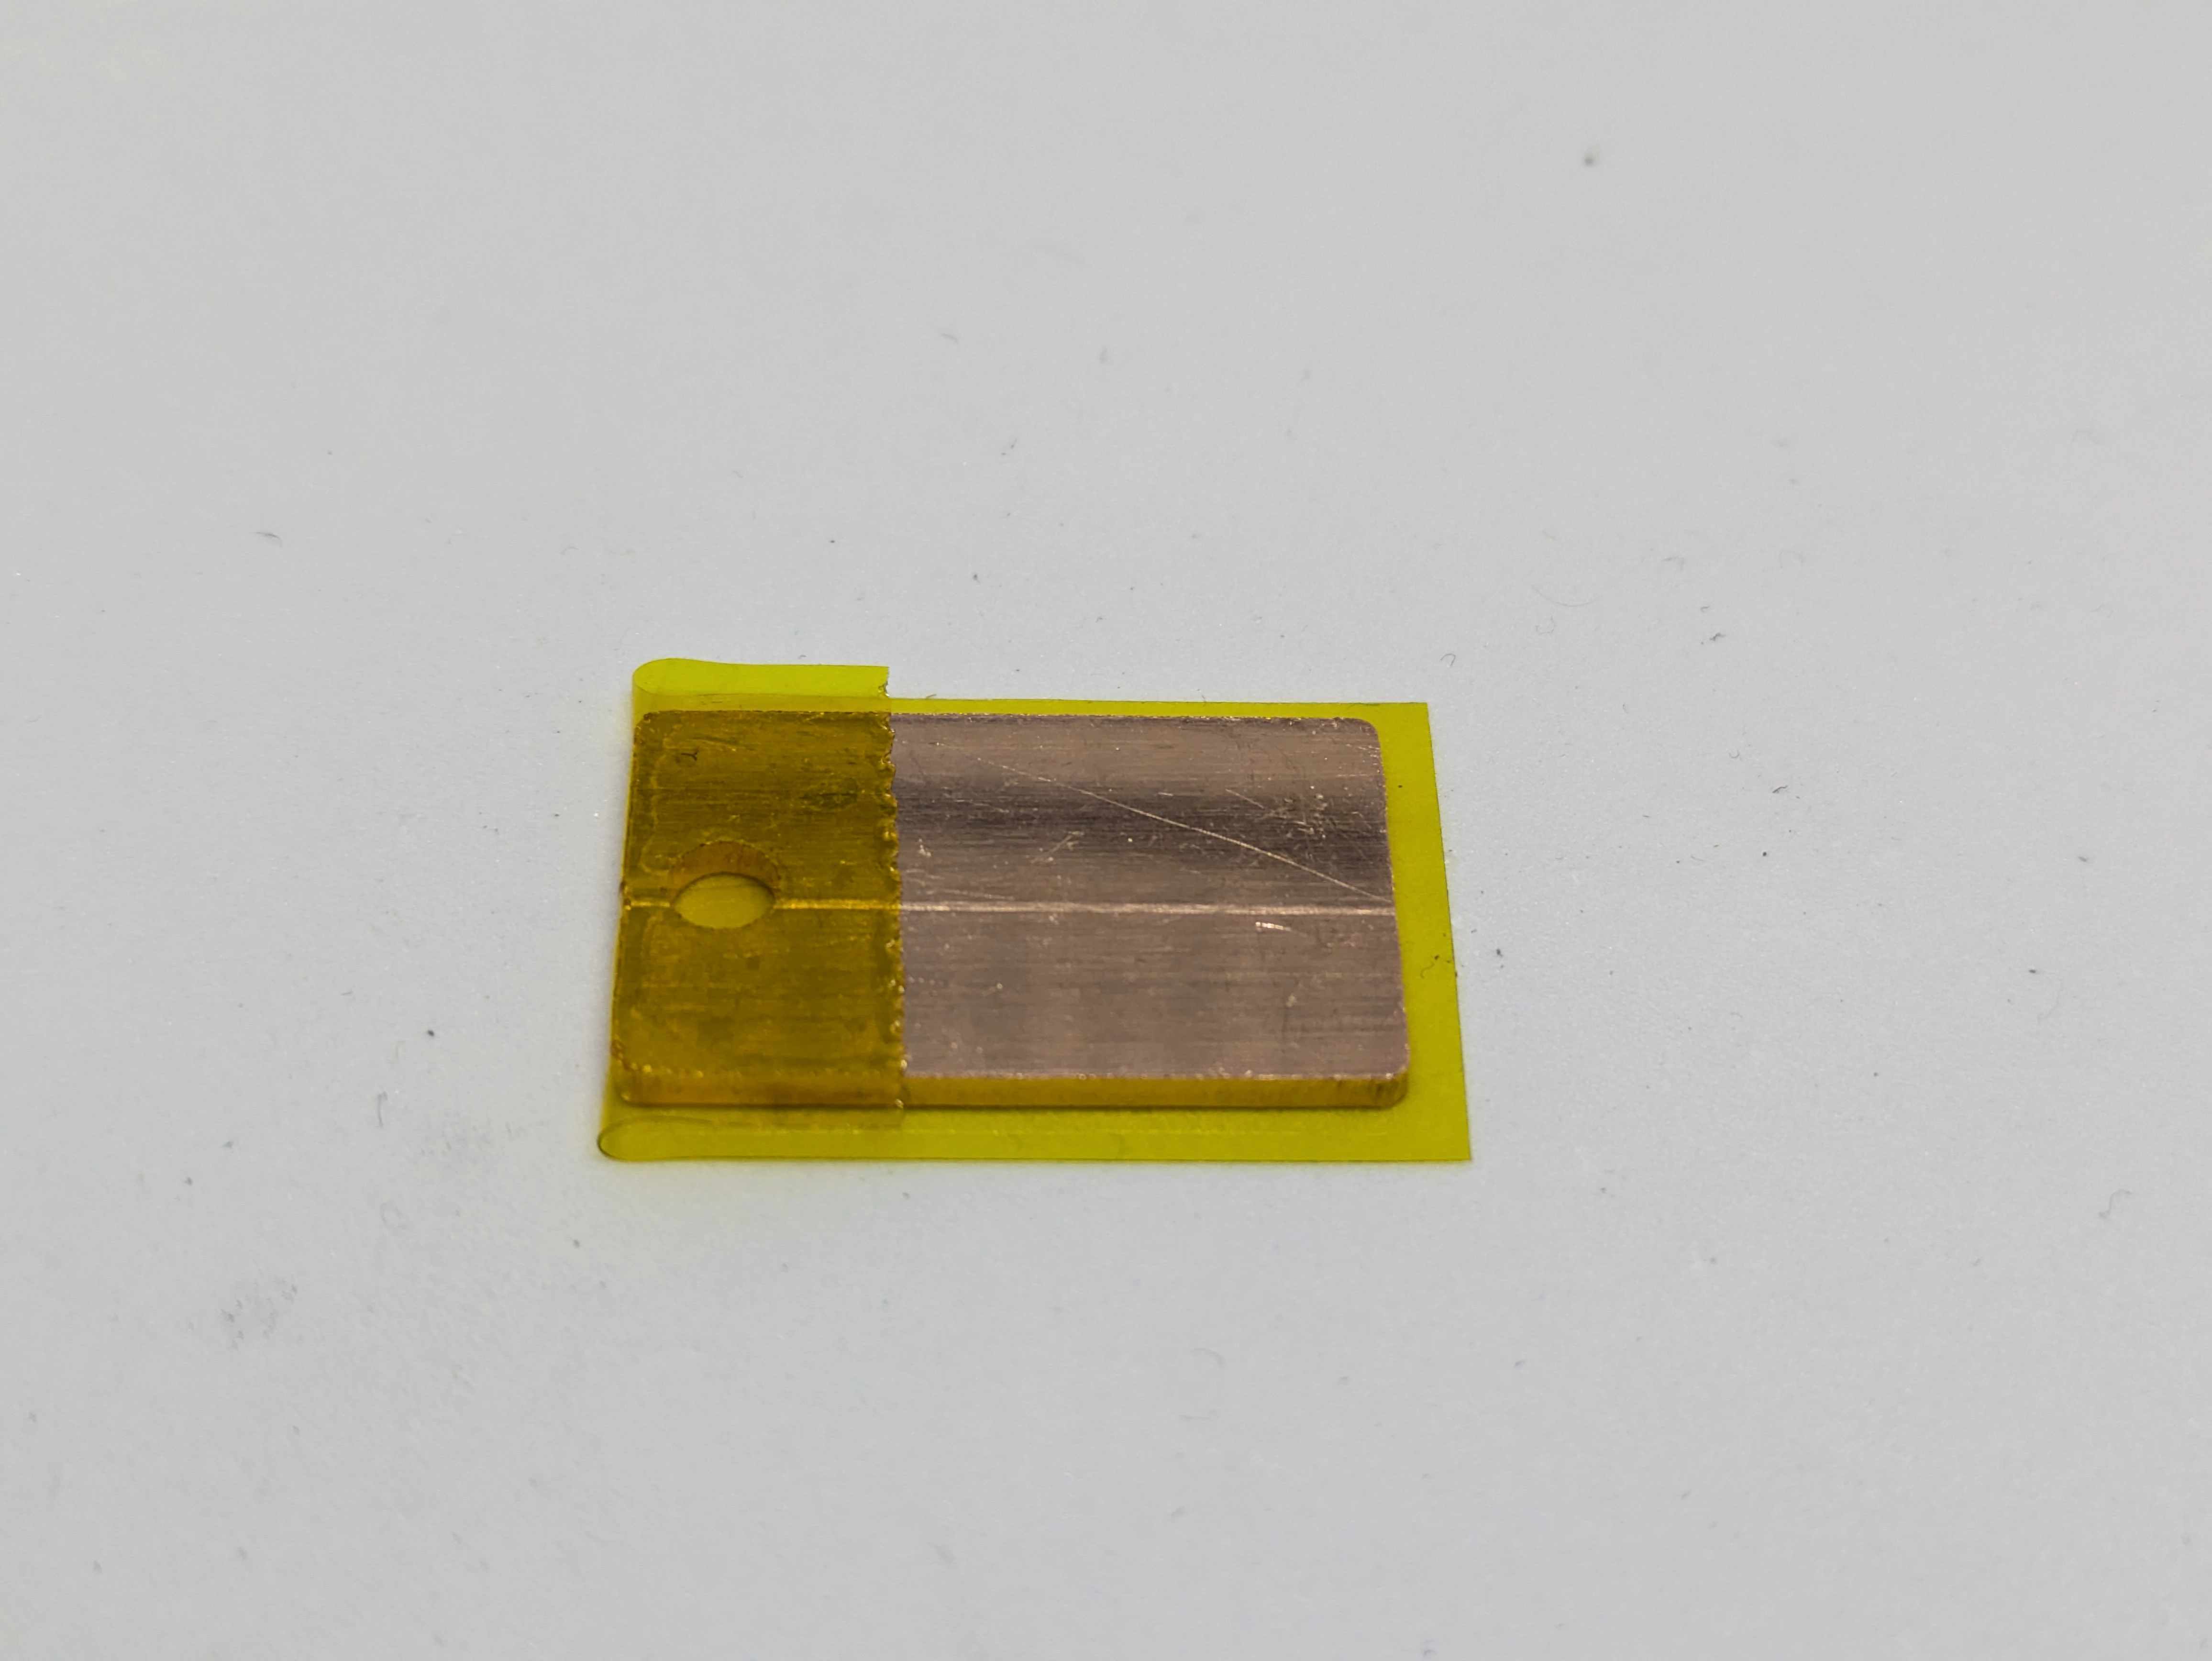
- Apply the flux paste to the center 1/3rd of the copper terminations. The termination should have three sections dividing the length of it into thirds:
- 1/3 covered with tape (covering the hole)
- 1/3 have flux on copper
- 1/3 bare copper
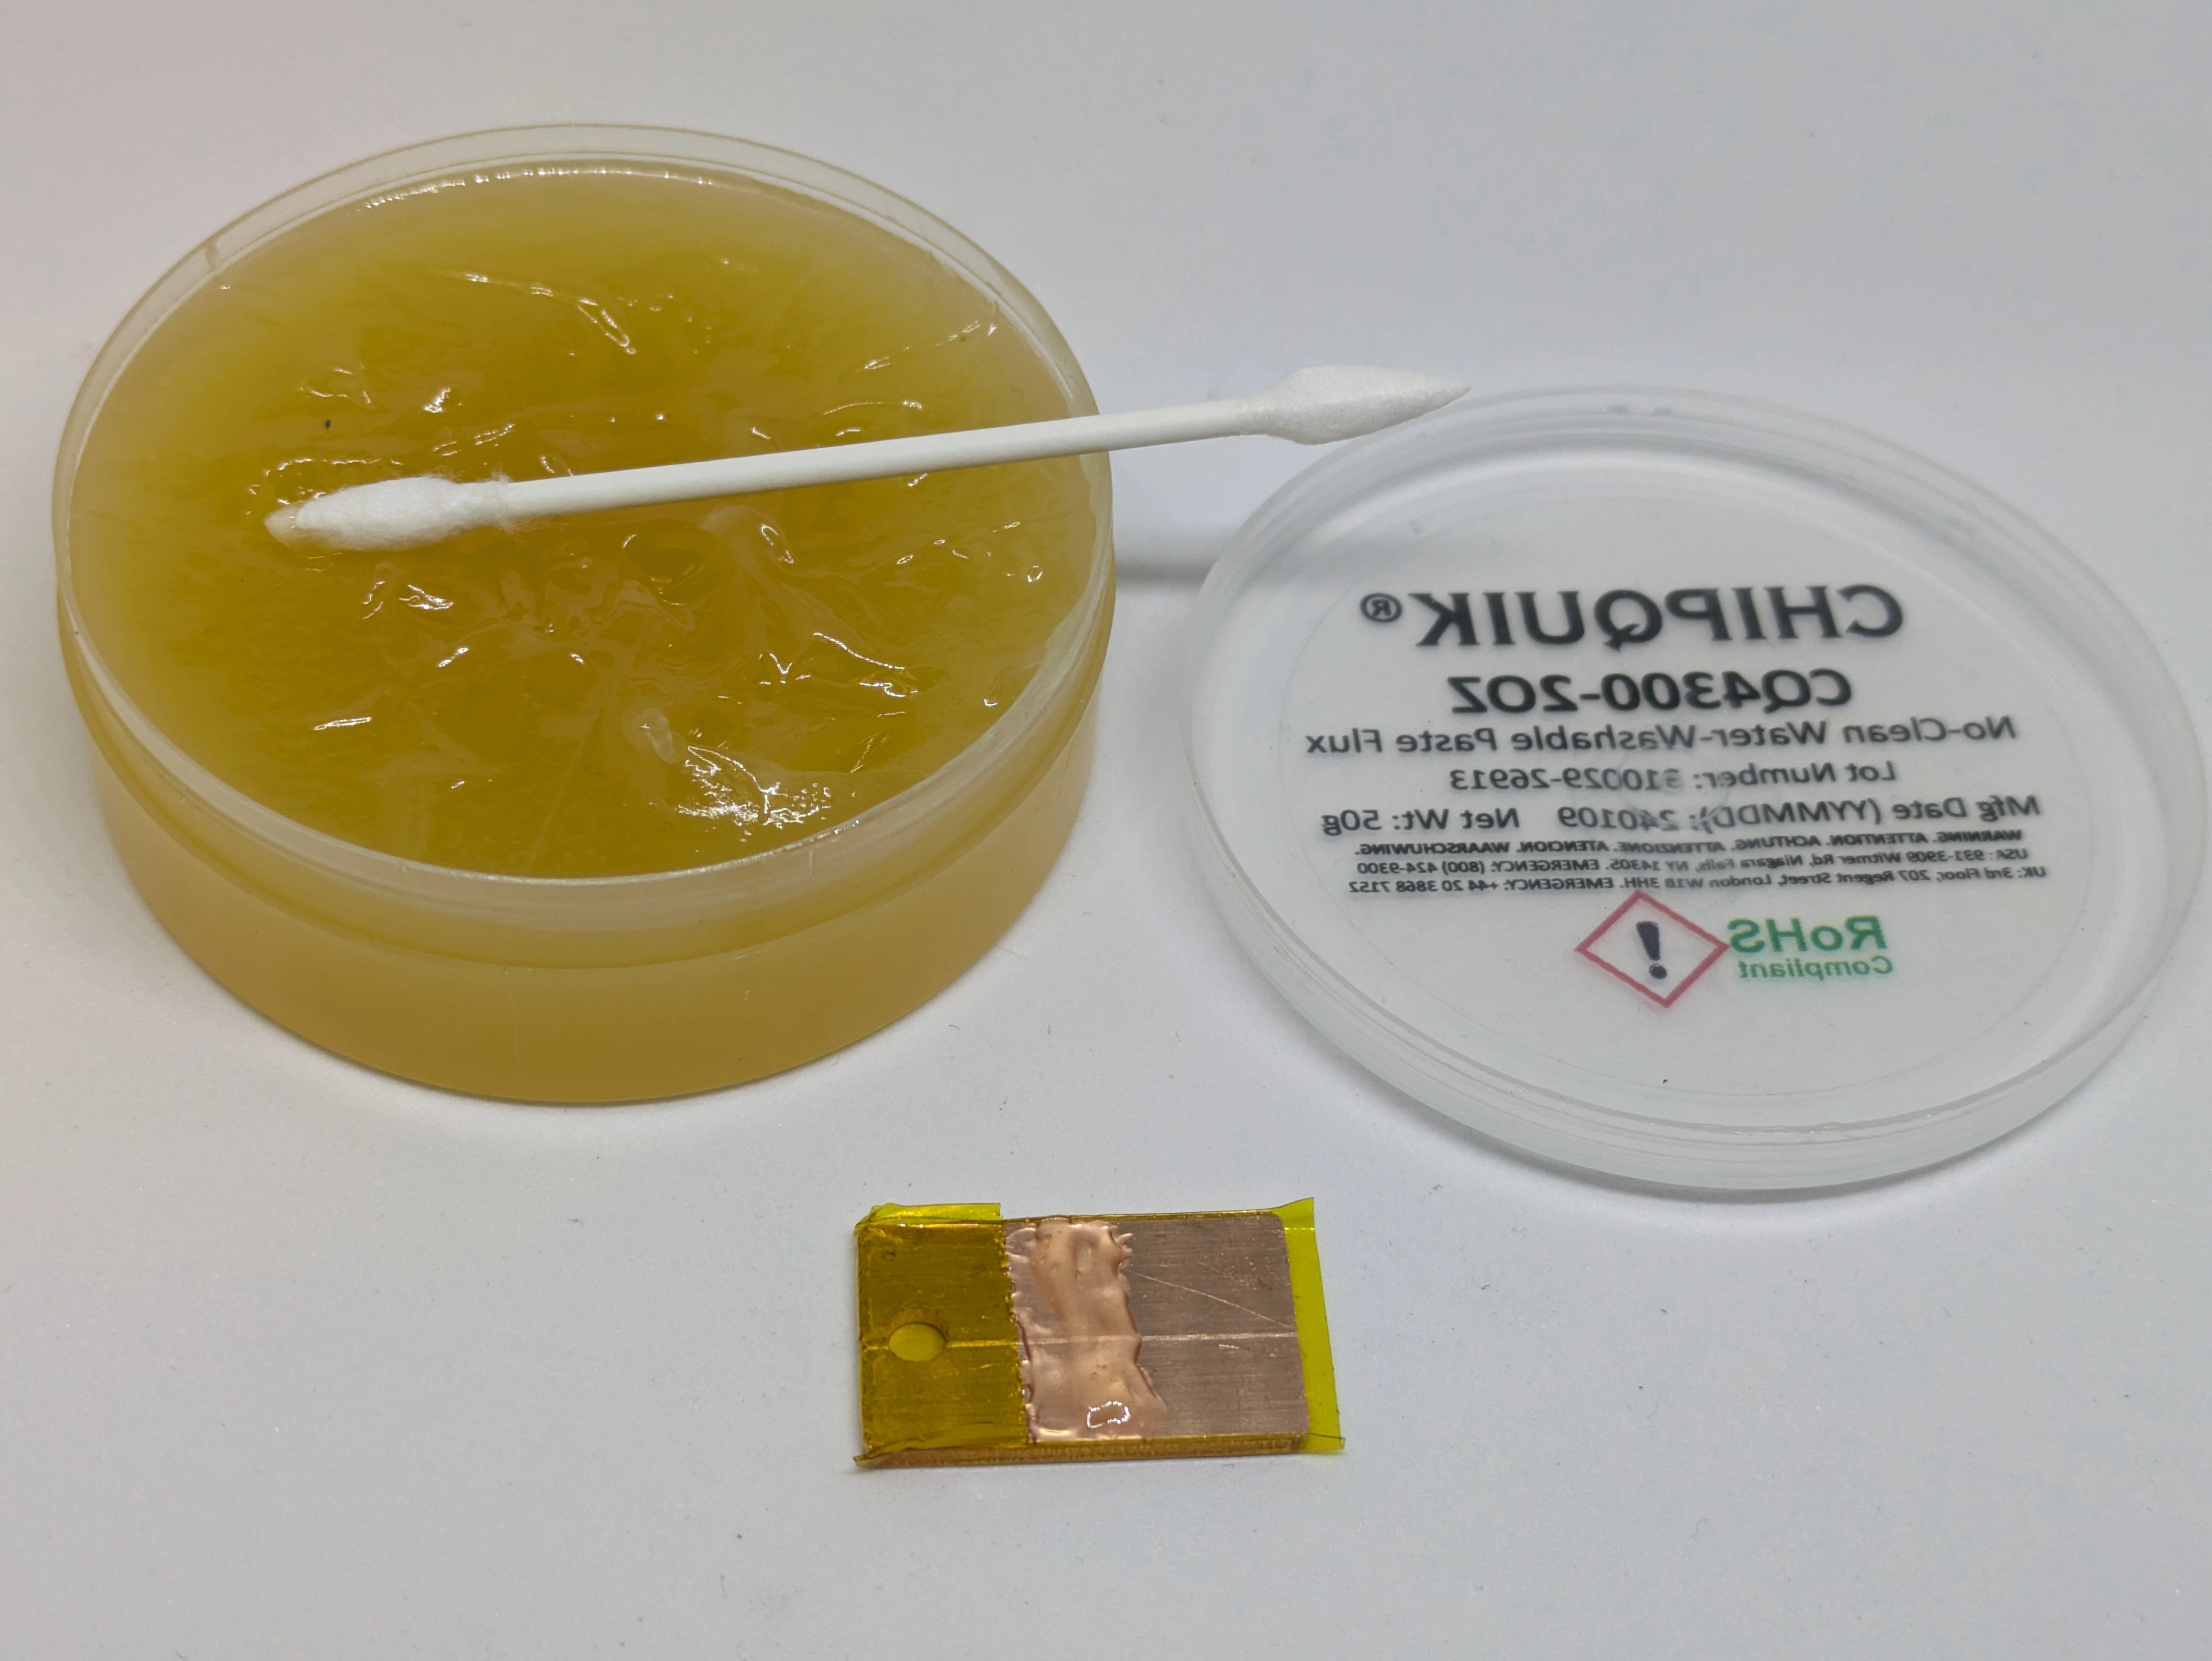
- Place the copper braid so it covers the 2/3rds of the termination without tape. The flux will be squished between the braid and the termination.
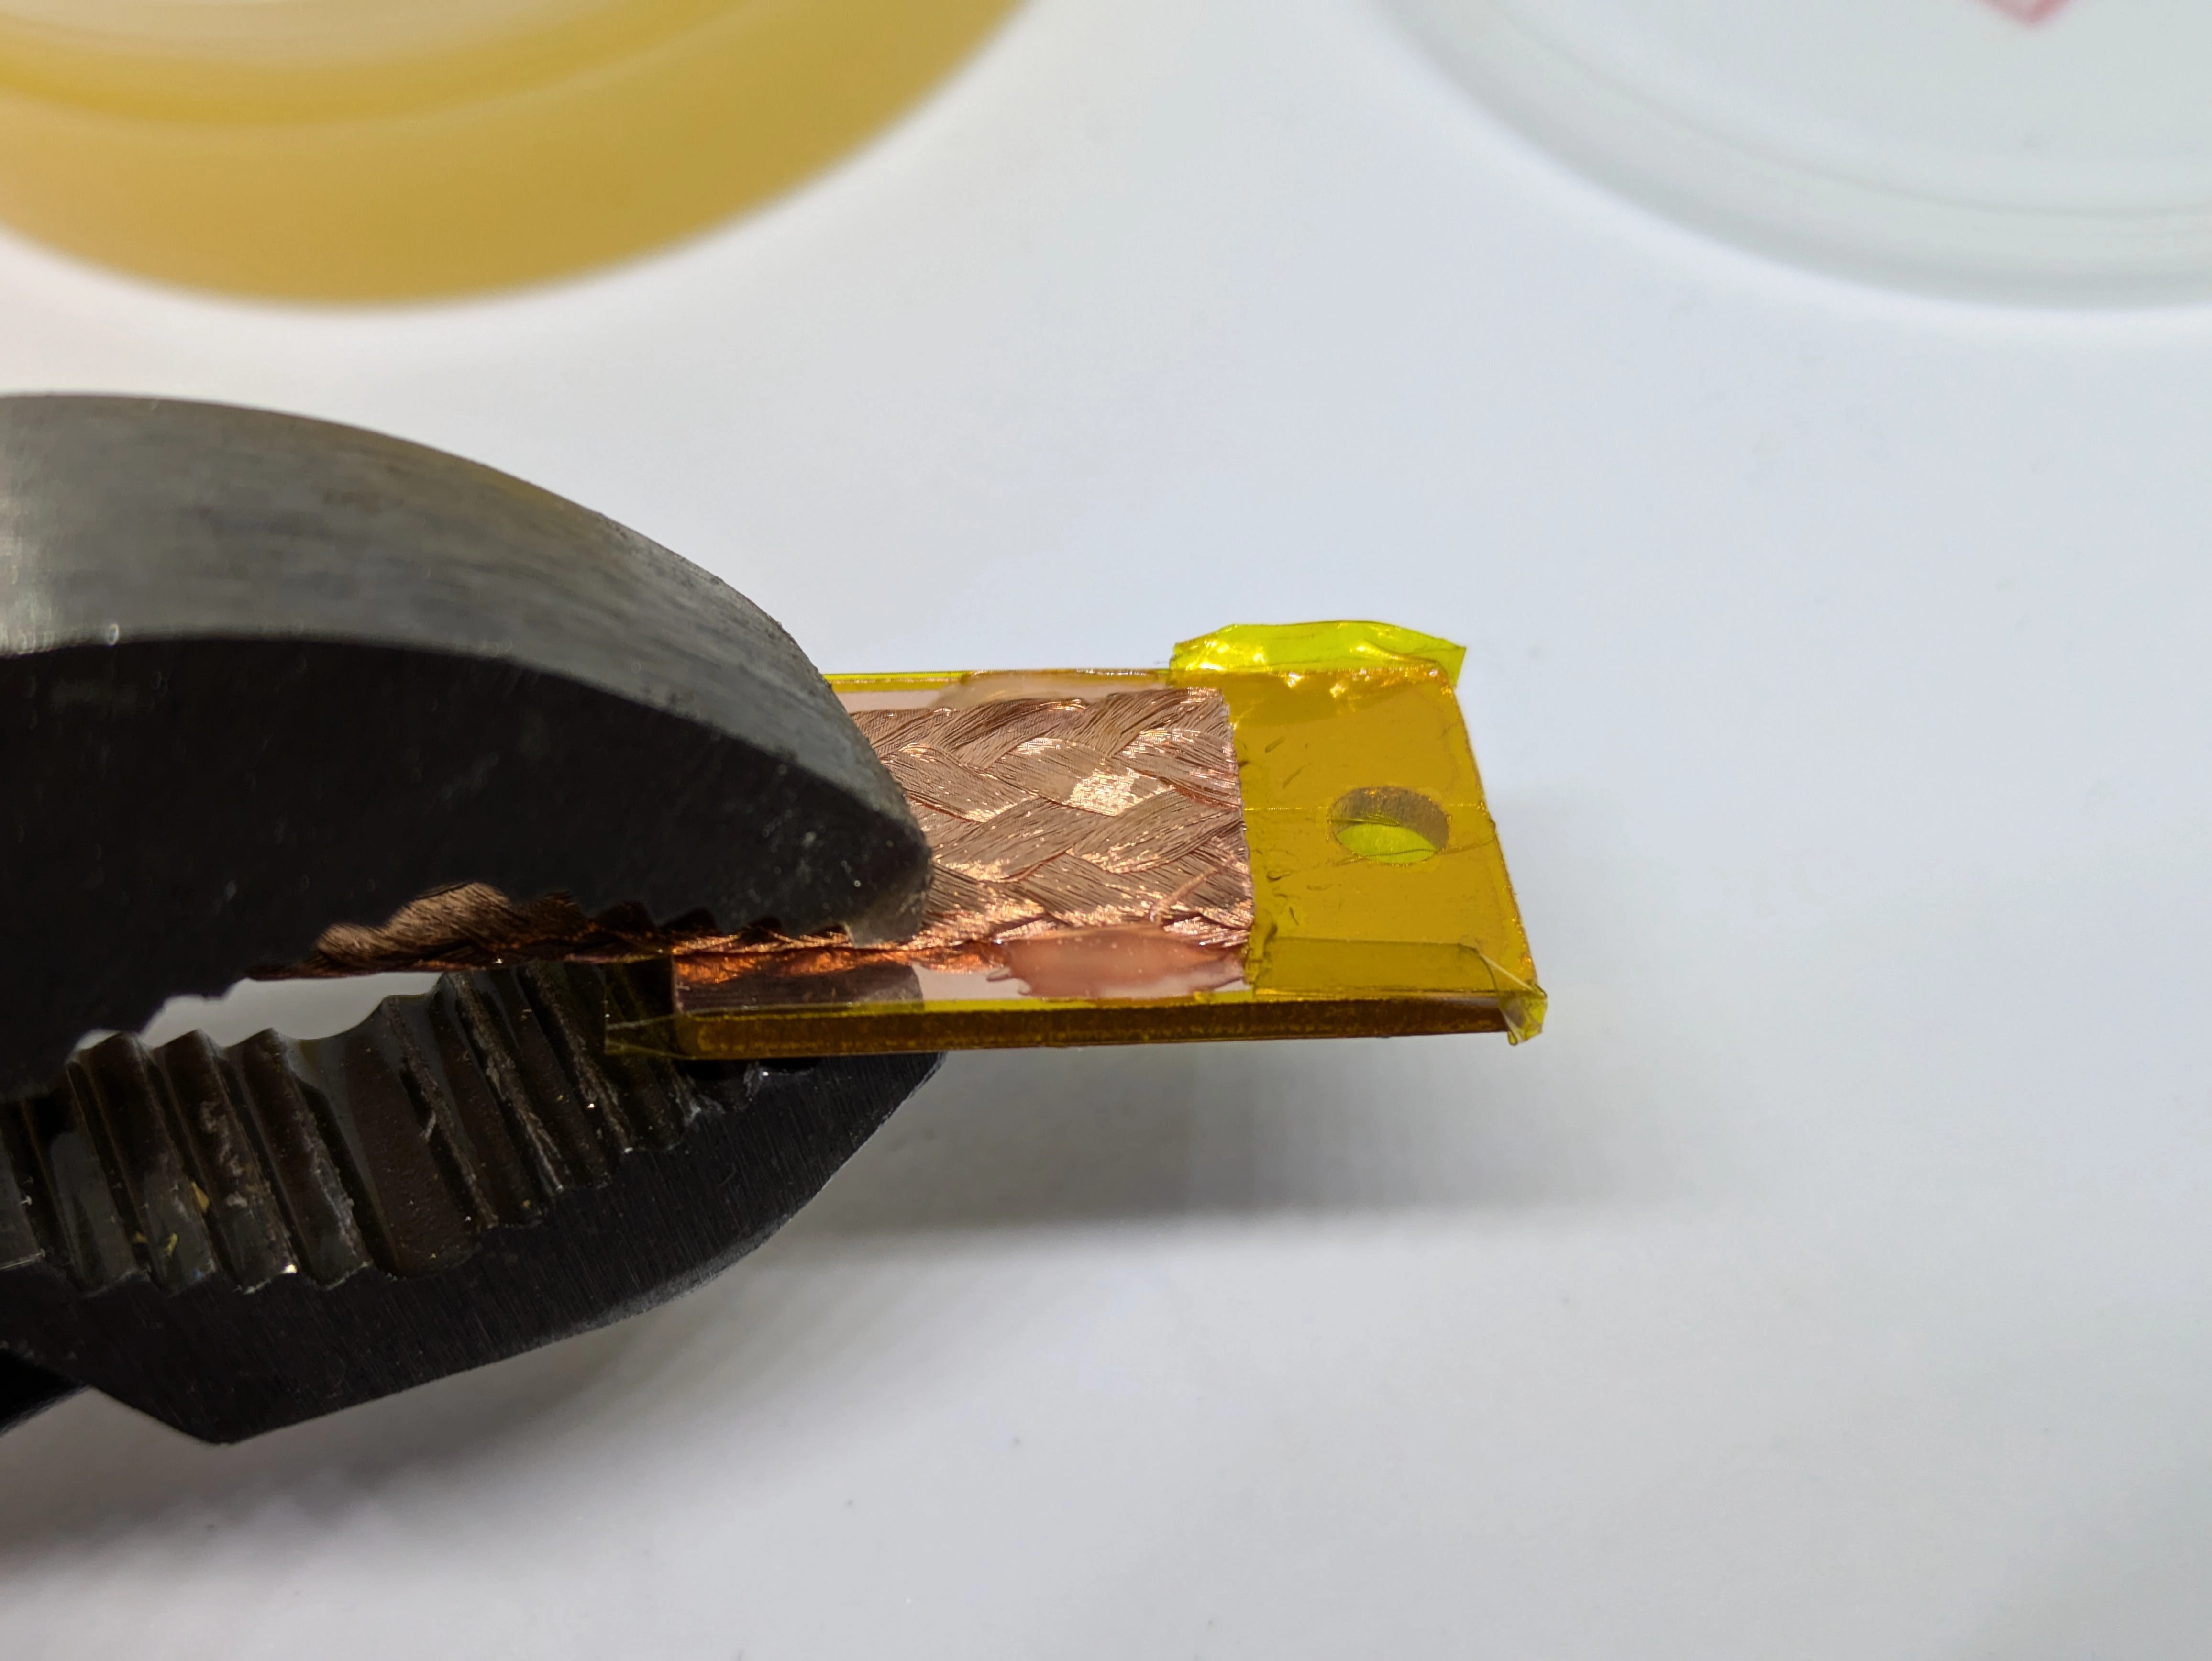
- Use the channel-lock pliers to pinch together the braid and termination, ideally pinching the end 1/3rd of assembly. It is OK if the pliers come in at a slight angle
-
Dip the assembly into molten solder in your solder pot such that it submerges 2/3rds of the termination, leaving the bare-copper 1/3rd of the assembly out of the solder
-
Keep the assembly submerged for 3-10 seconds (will vary on your circumstances), at this point the solder should formed a connection between the termination and the braid
-
Remove the hot assembly and dunk it in water to cool it off
FIXME PICTURE OF SOLDER DUNKING -
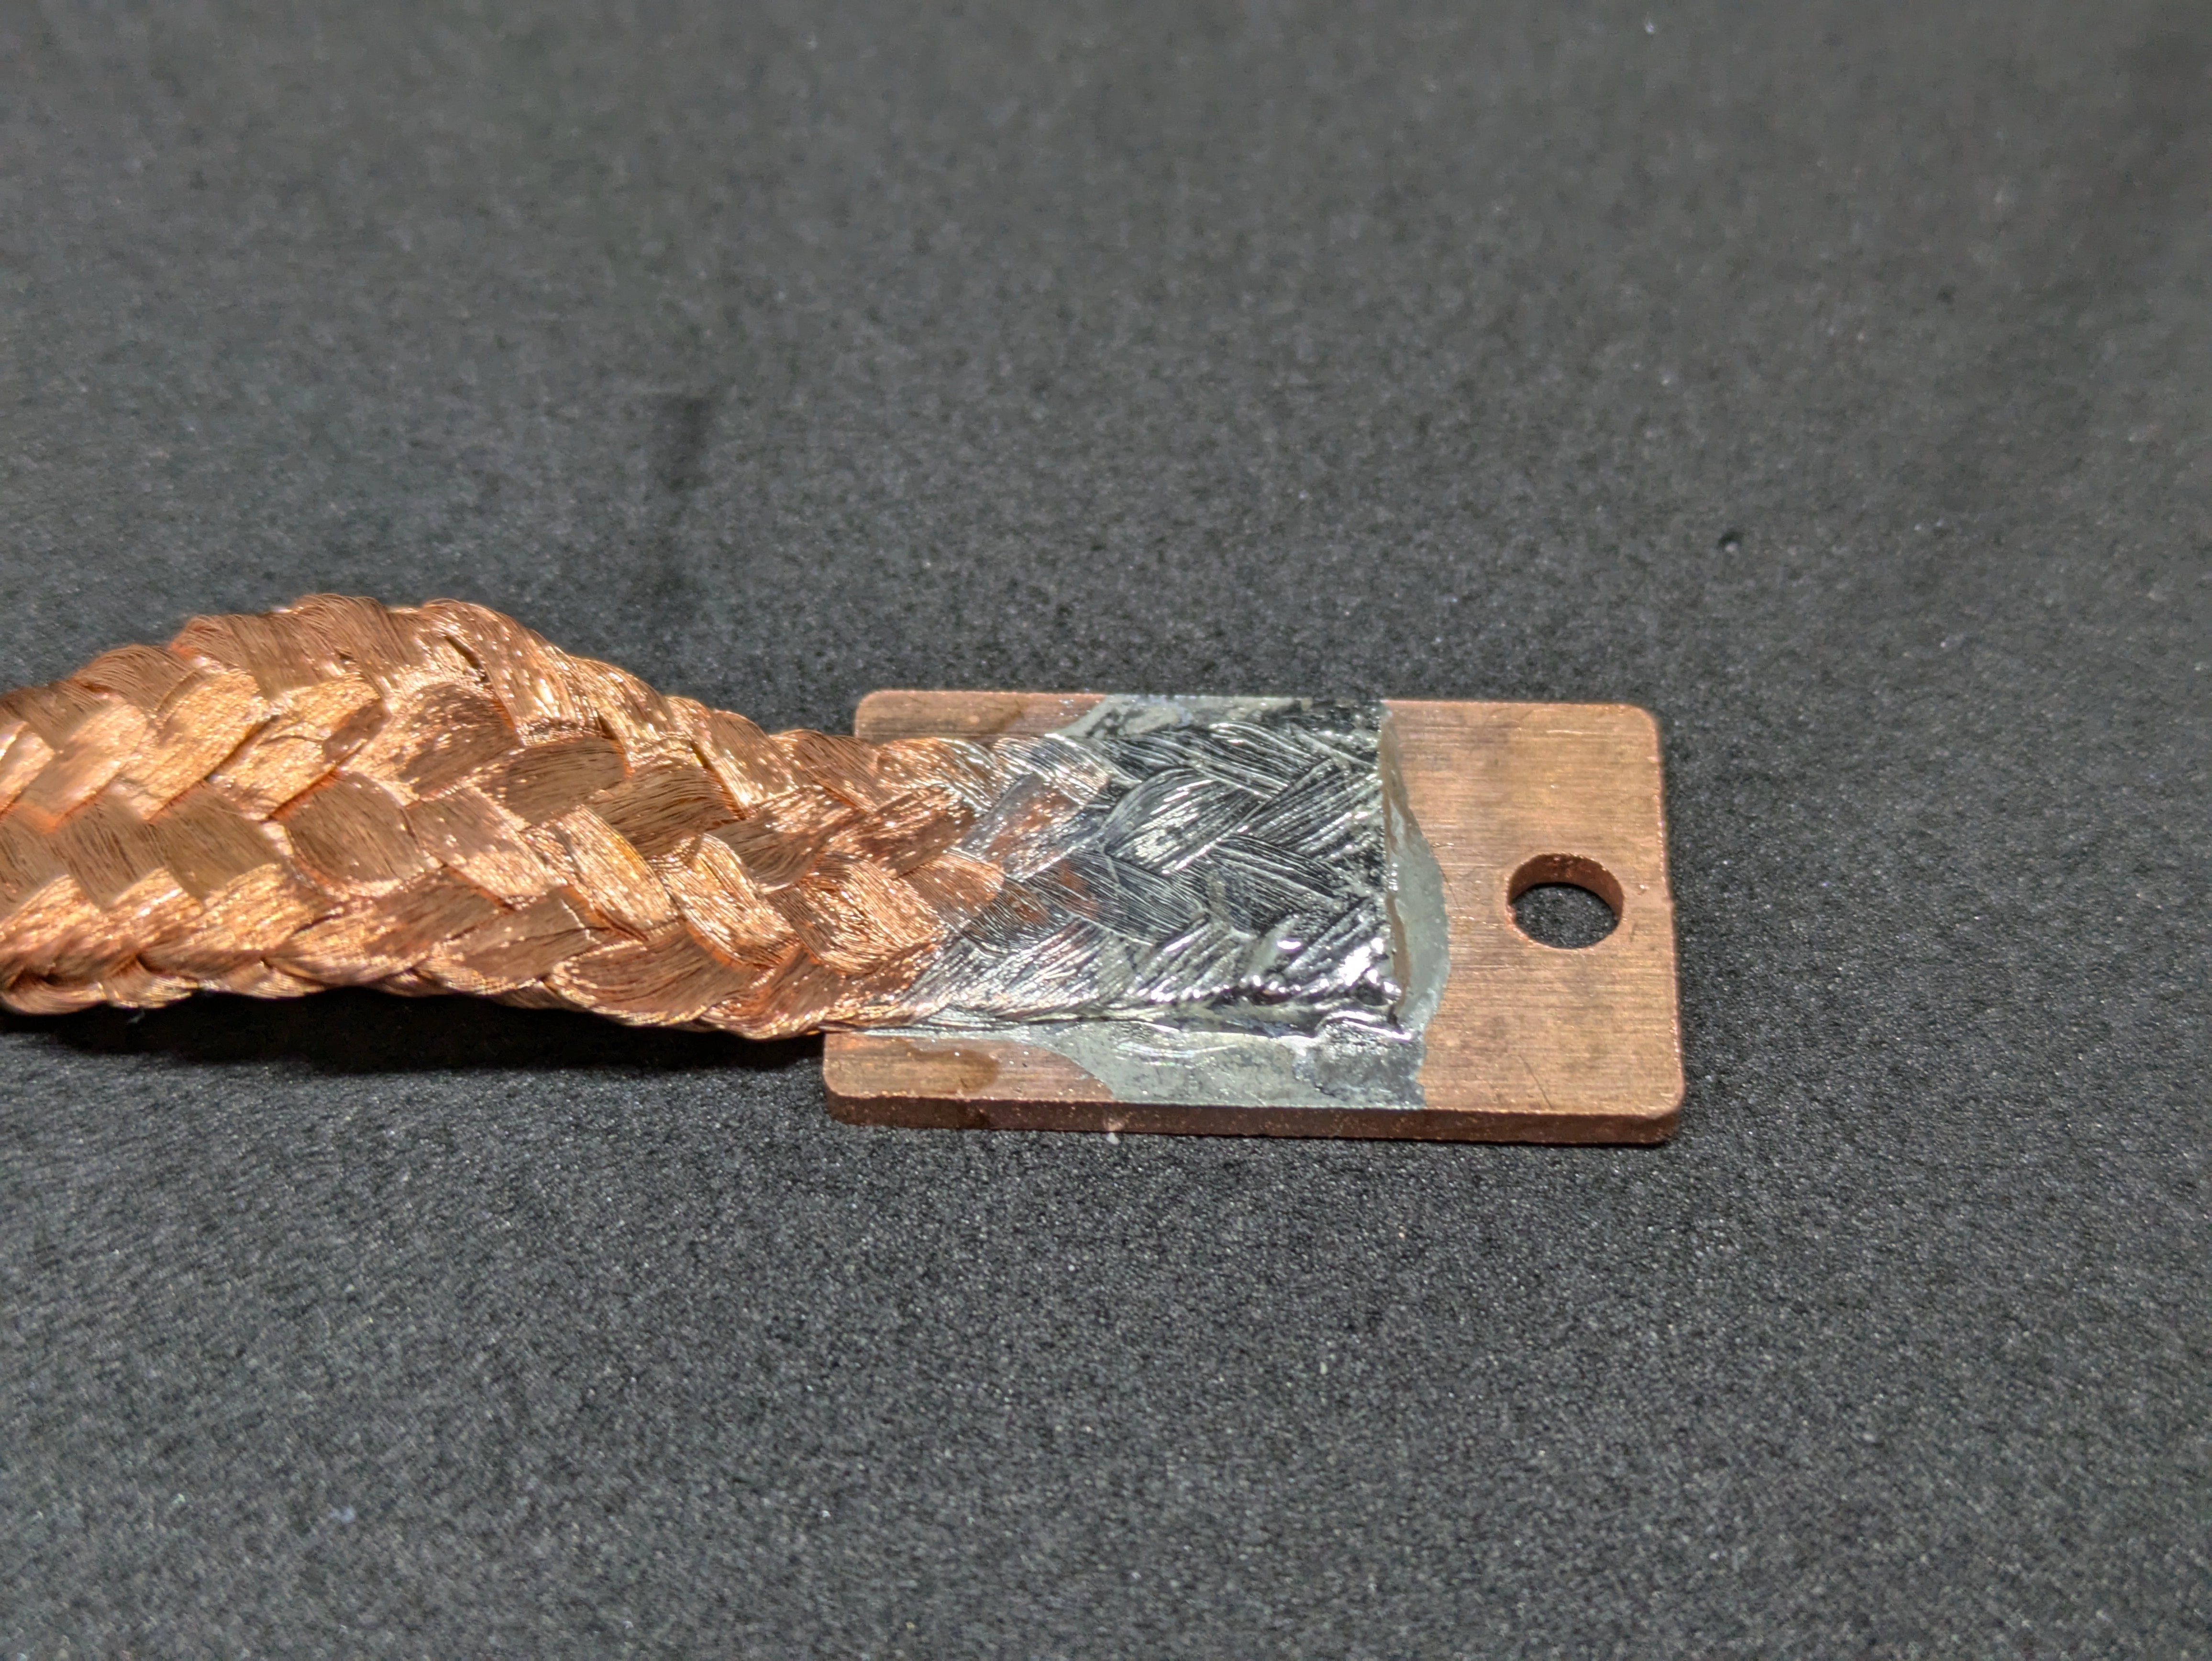
The ideal connection should look like the following, where the solder has fully connected the braid to the termination in the center 1/3rd of the termination. The solder should not creep beyond the length of the termination or it will reduce the flexibility of the braid
-
Repeat the process to solder the second termination to the other side
-
Clean and finalize the assembly:
- Peel off any tape + excess solder
- Wash or sonicate the assembly in soapy water to remove any excess flux
- Optionally: Soak in a 5% citric acid solution to brighten the copper and passivate it