1K Cryostat
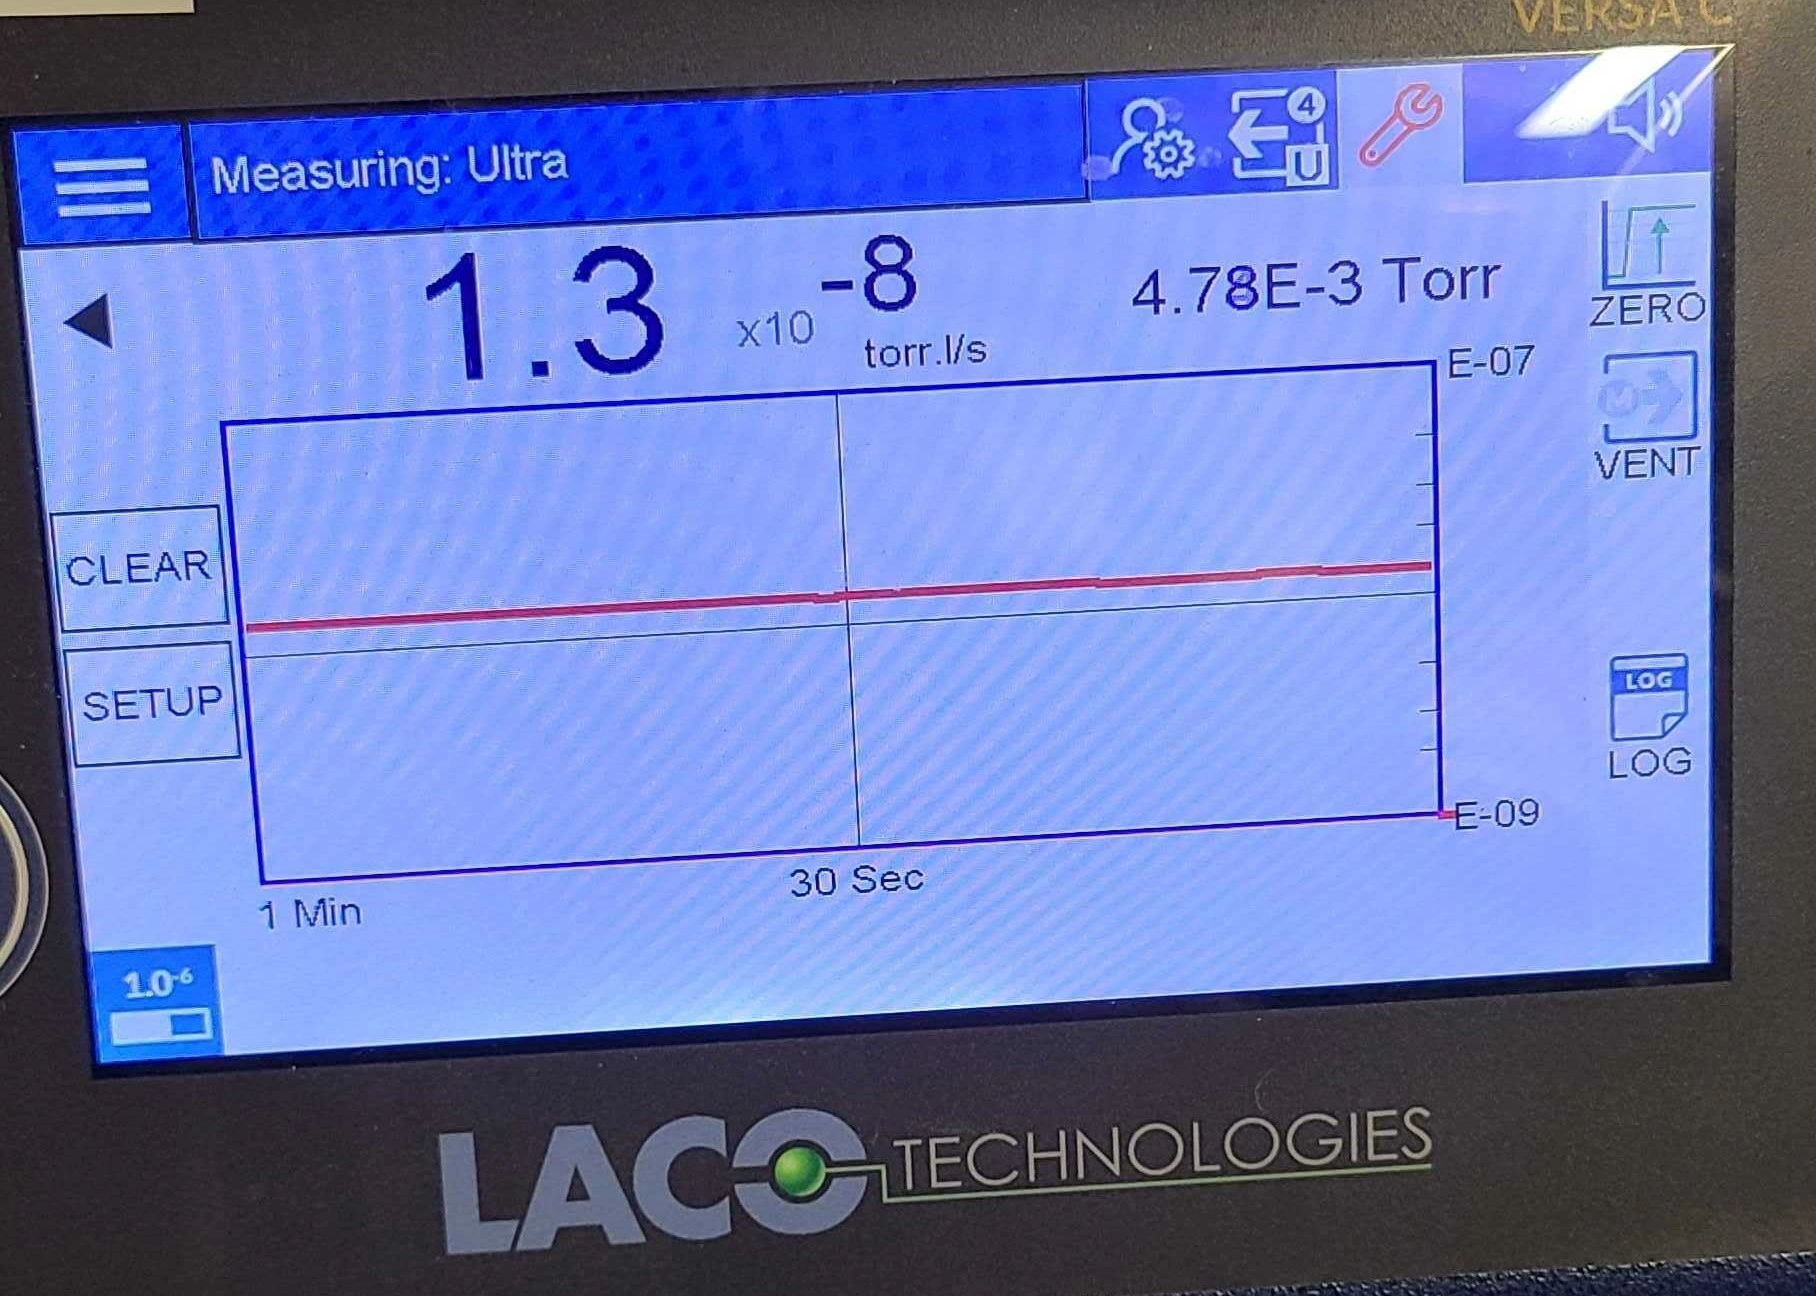
Leak checking
- Initial pump out had no problems. After pumping out over the weekend, the FIXME pressure gauges increase about 1 mtorr per 1-1.5 seconds.
- Not sure if I can trust pumping station pressure gauge but it read around 1e-8 torr
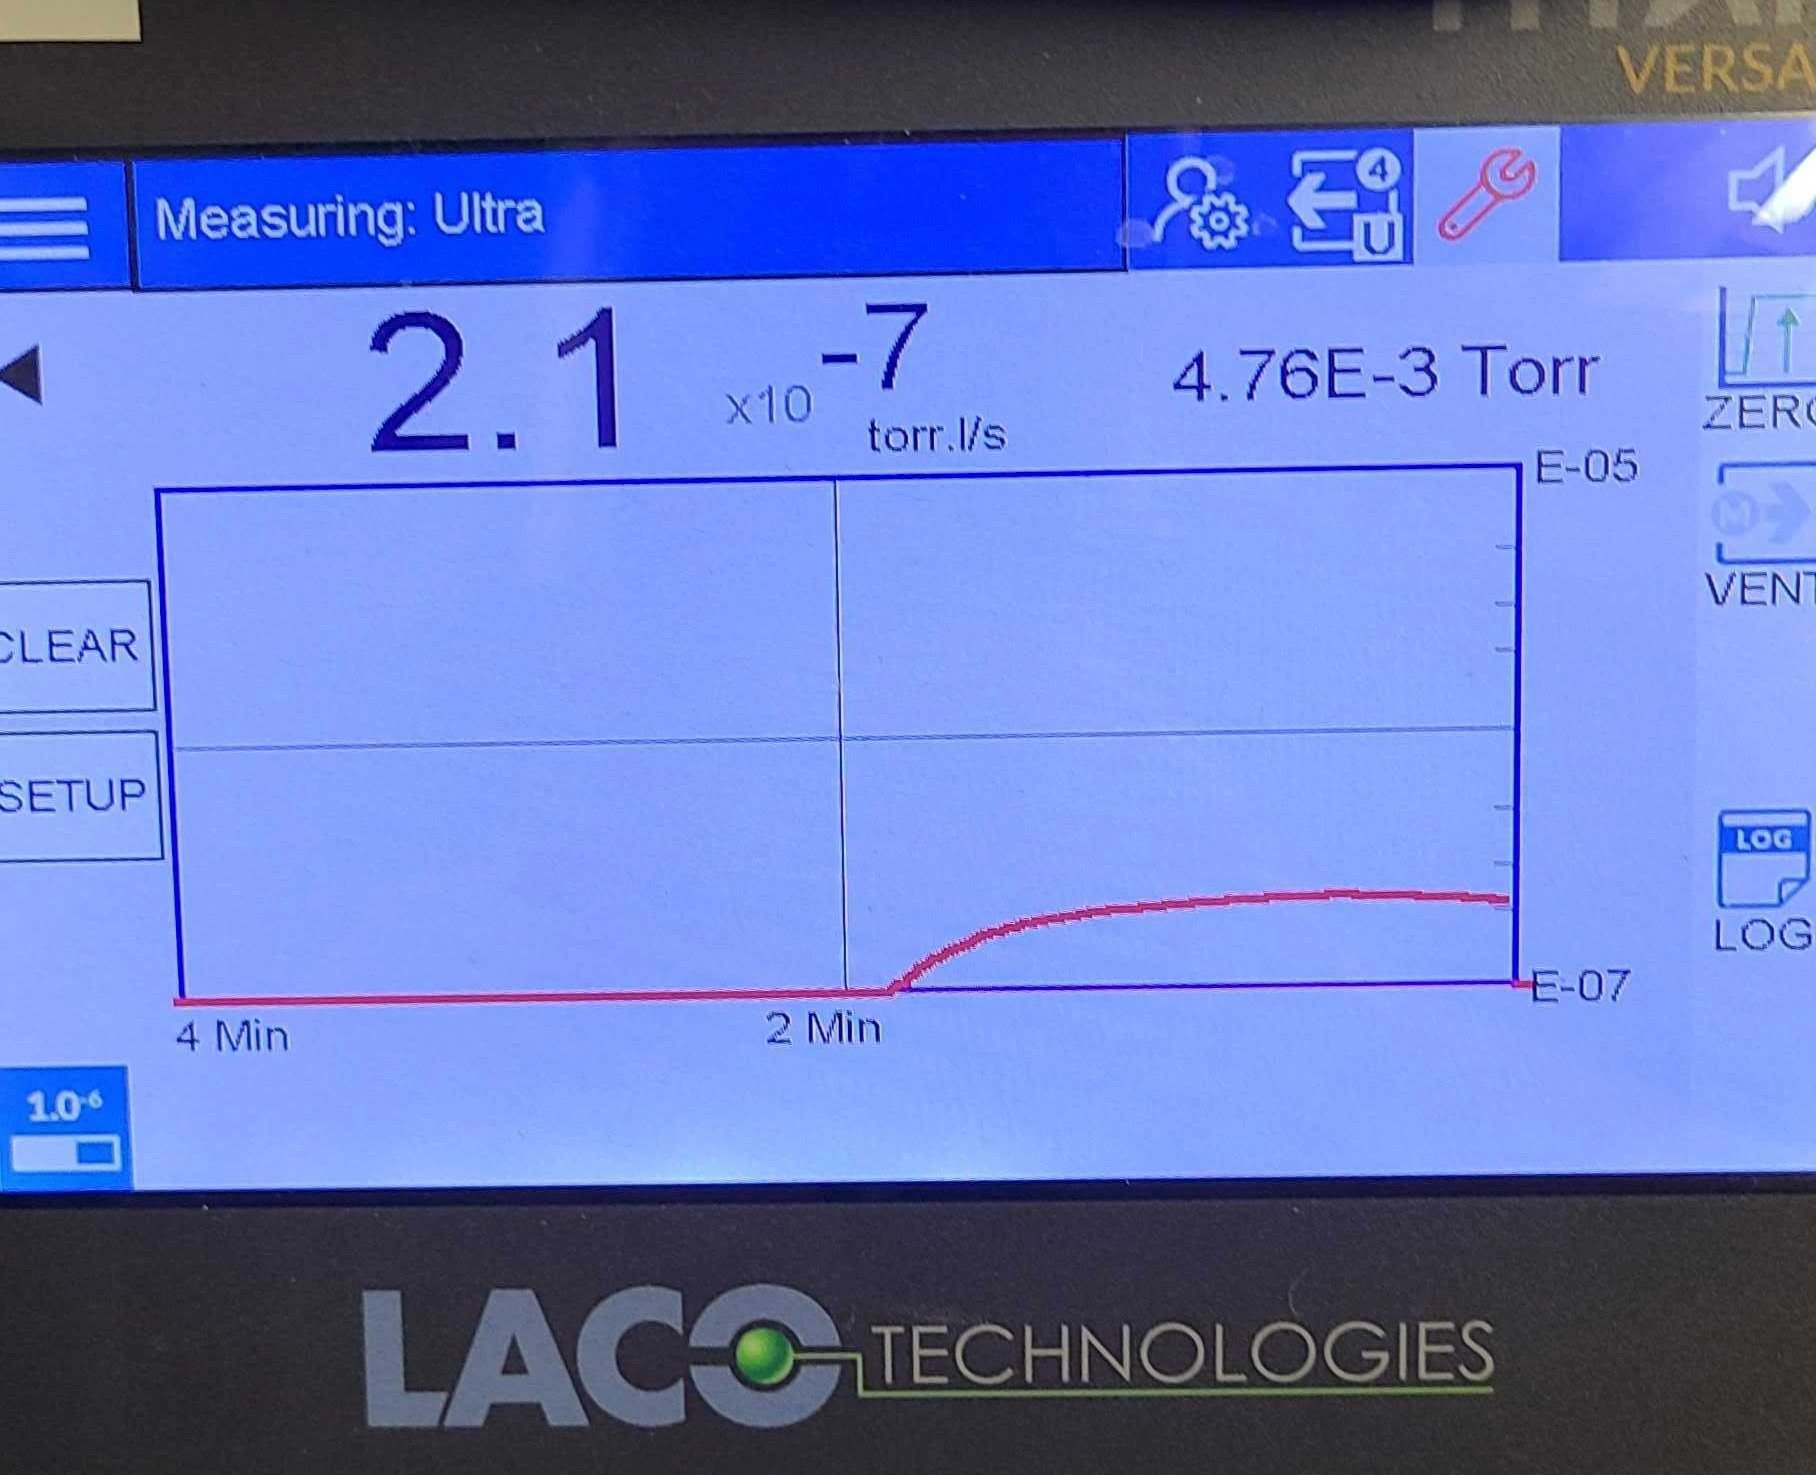
- Base leak rate without helium applied.
- KF50 thermometry feedthrough leak rate
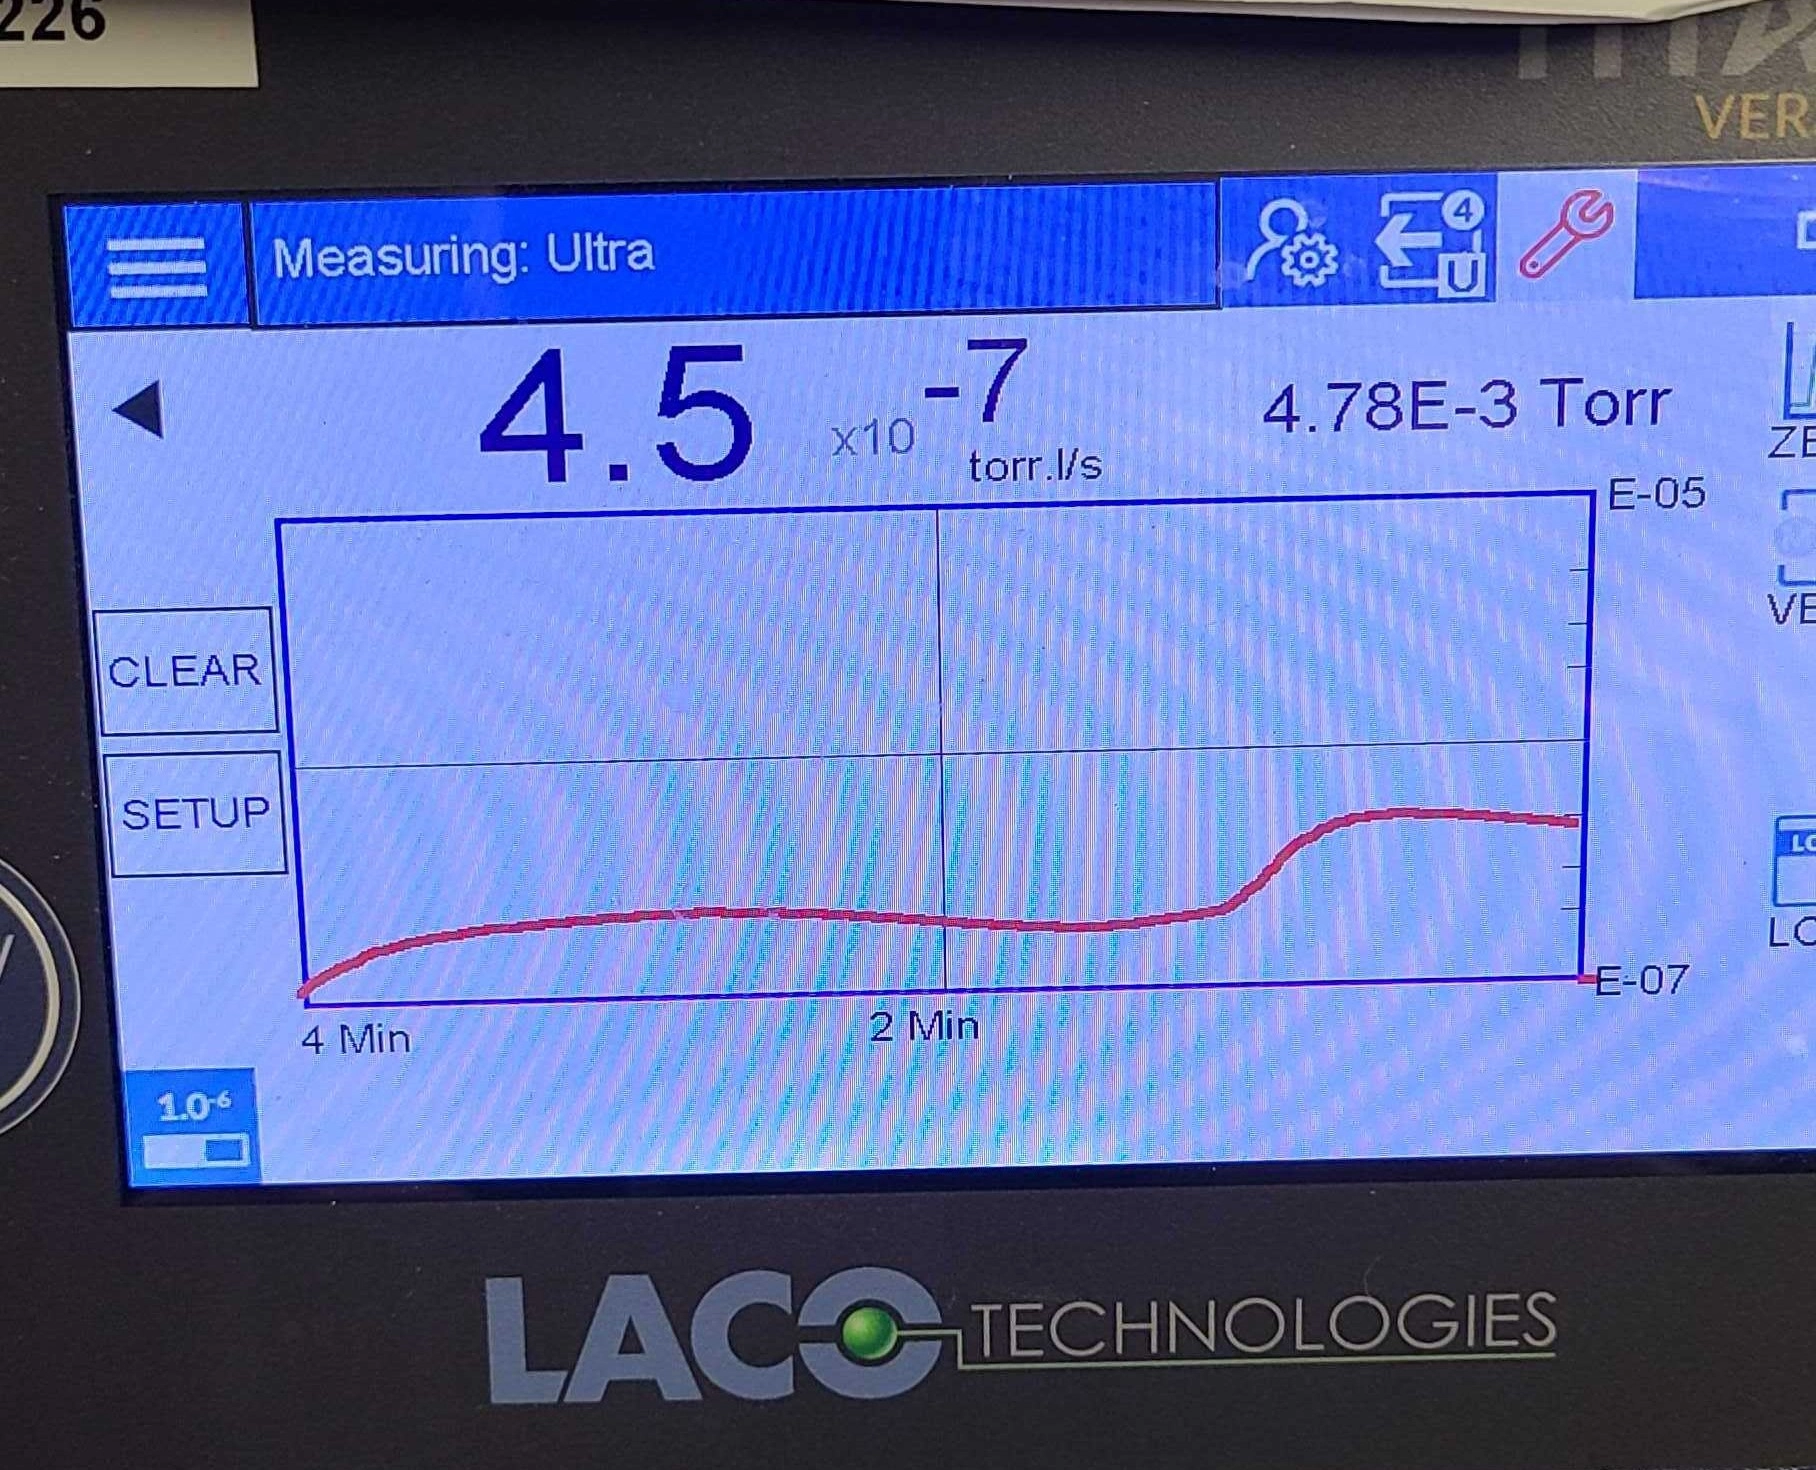
- RDK101D adapter plate leak rate
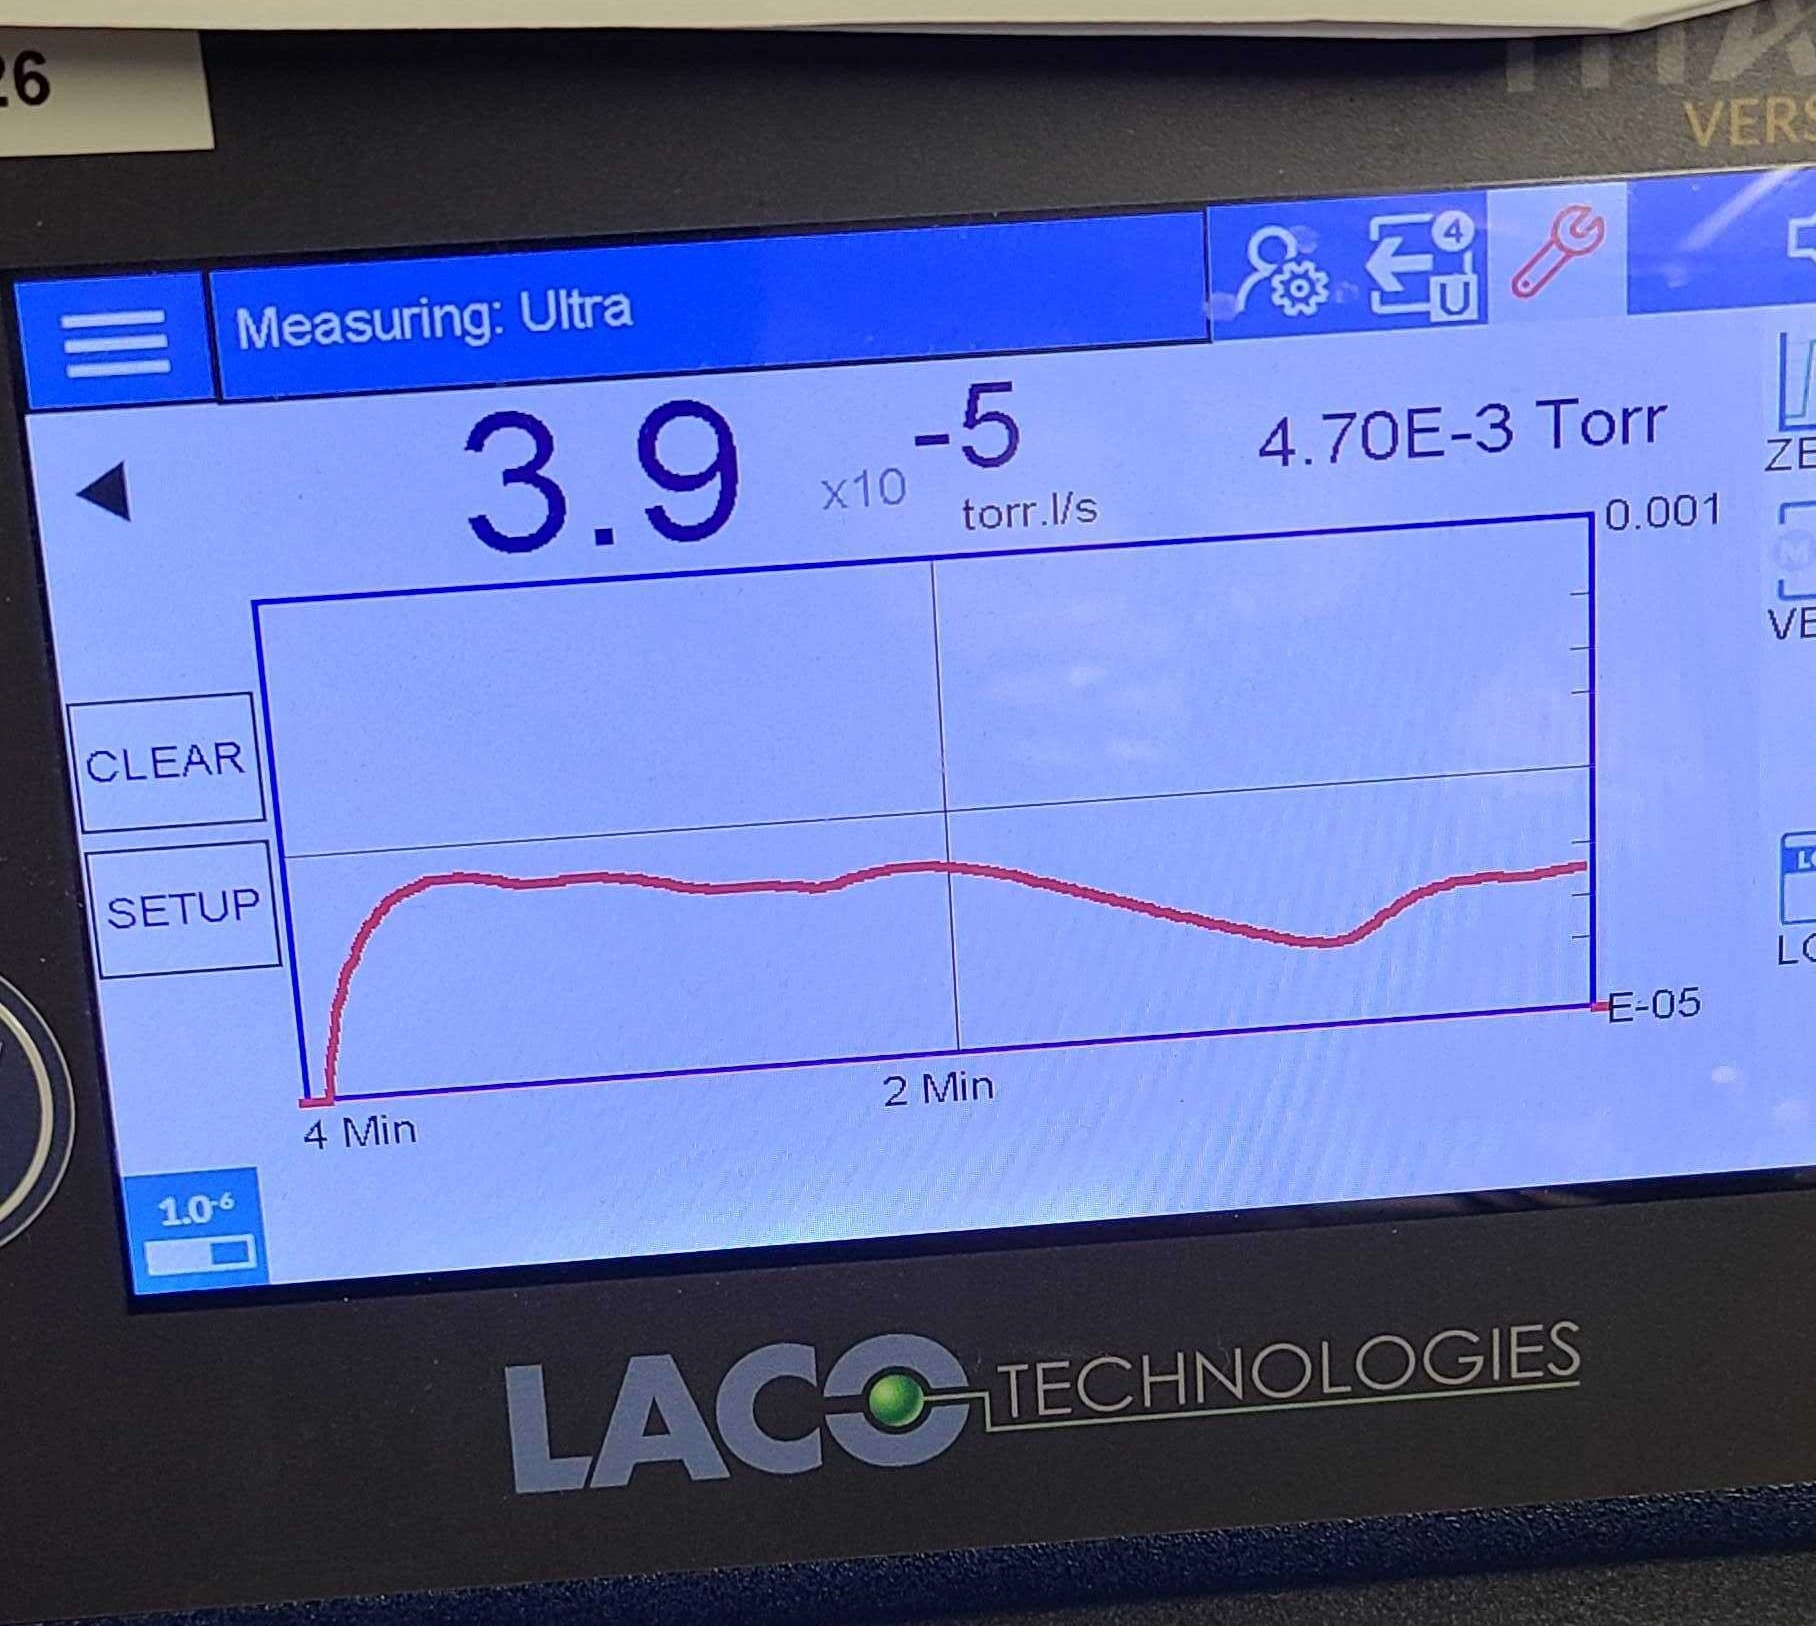
- IdealVac walls
First cooldown
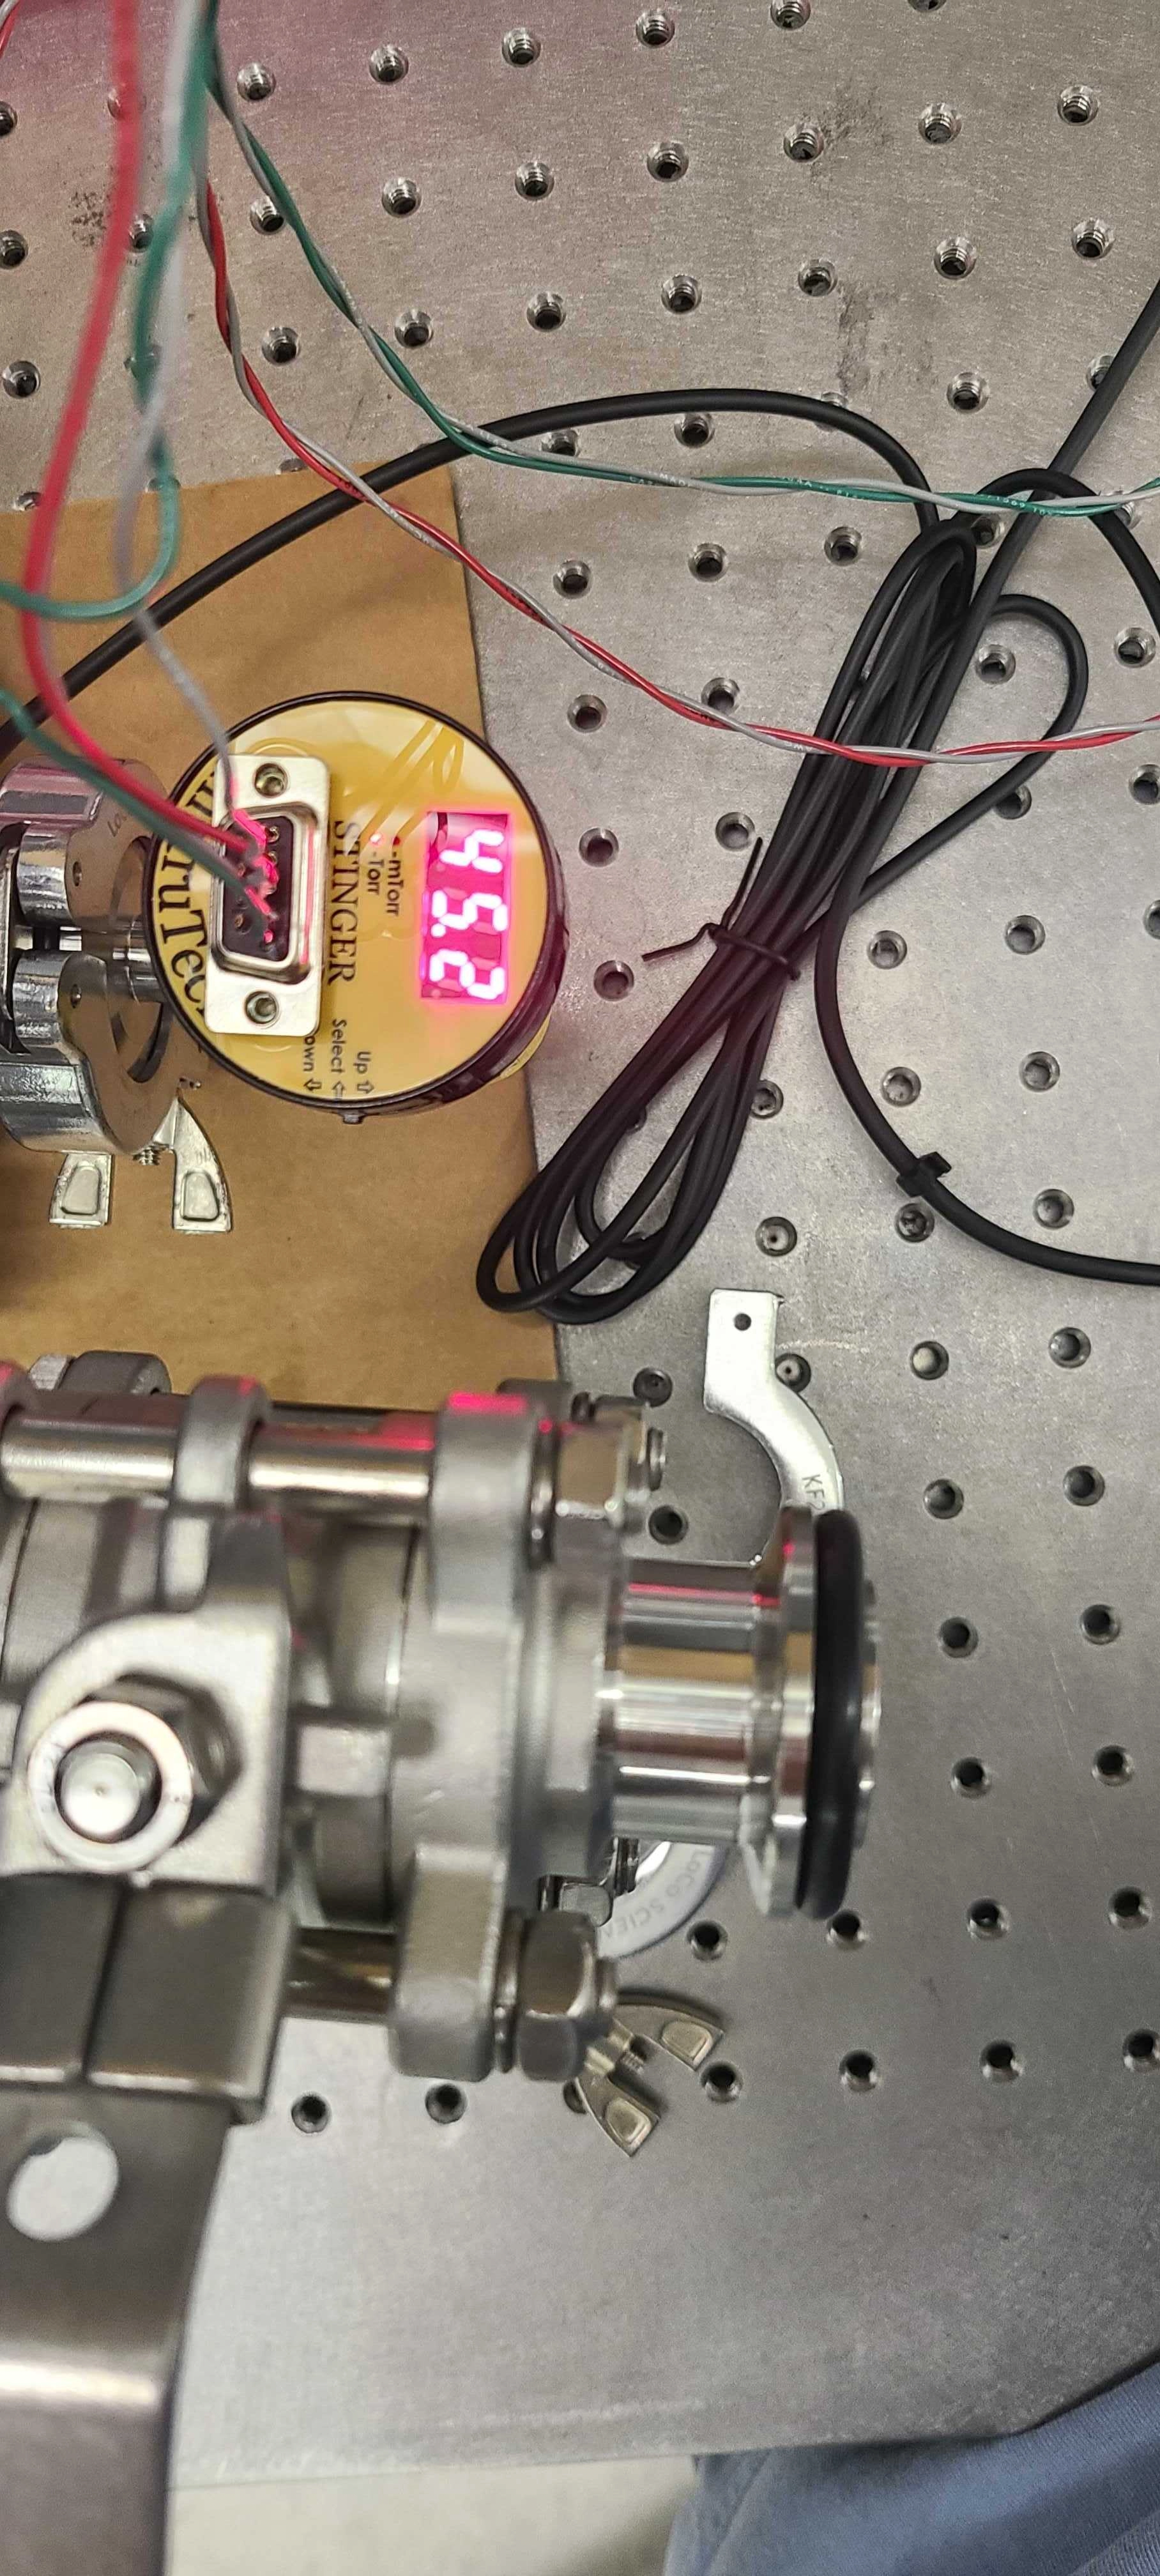
- Base pressure reached 5.1 mtorr < 10min
- NOTE: First cooldown does NOT include black body shields of any sort.
- A single PEEK screw is used on the 300K→40K plate & 40K → 4K plate. Each with 5x spring washers
- Thermometers:
- 40K DT670 is on the bottom side of the TOP 40K plate
- 4K DT670 is on bottom 4K plate (make take a awhile to cooldown since it must cooldown the entire 4K box)
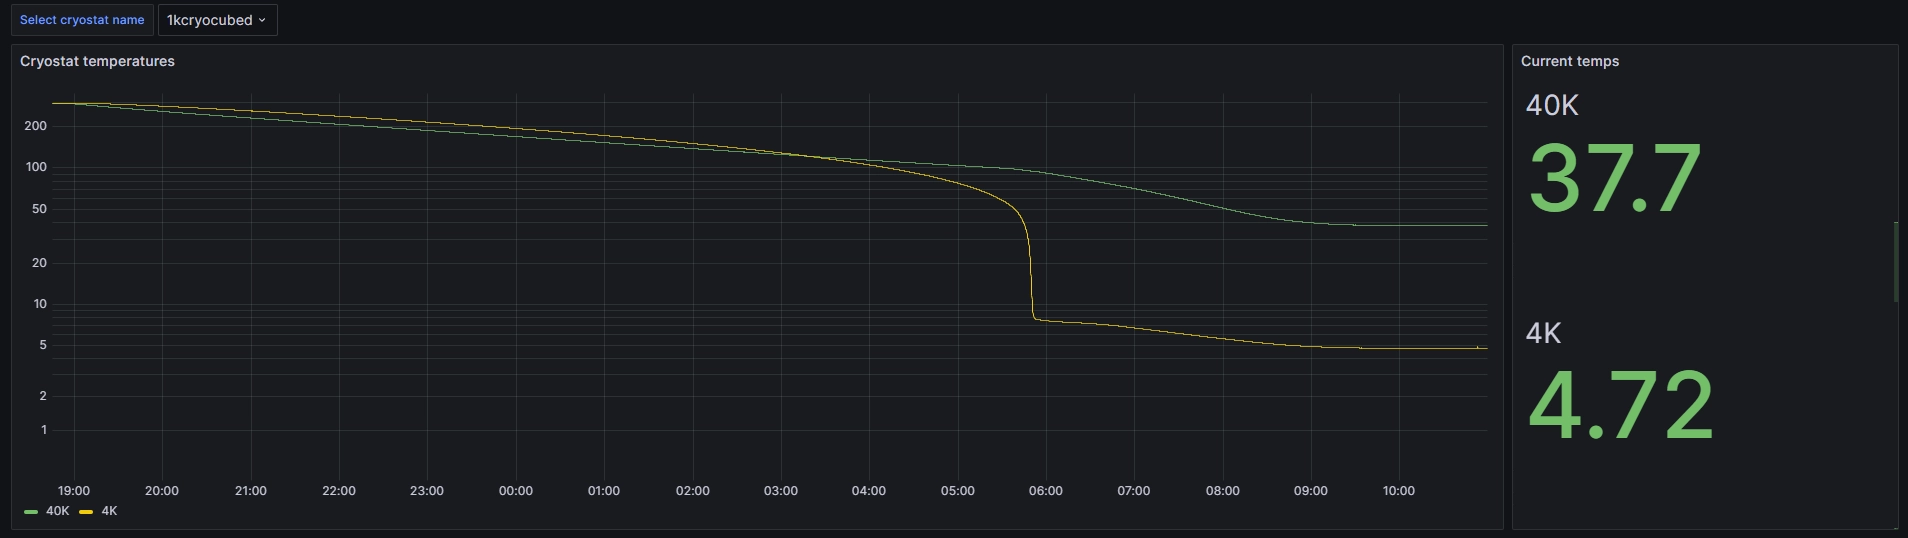
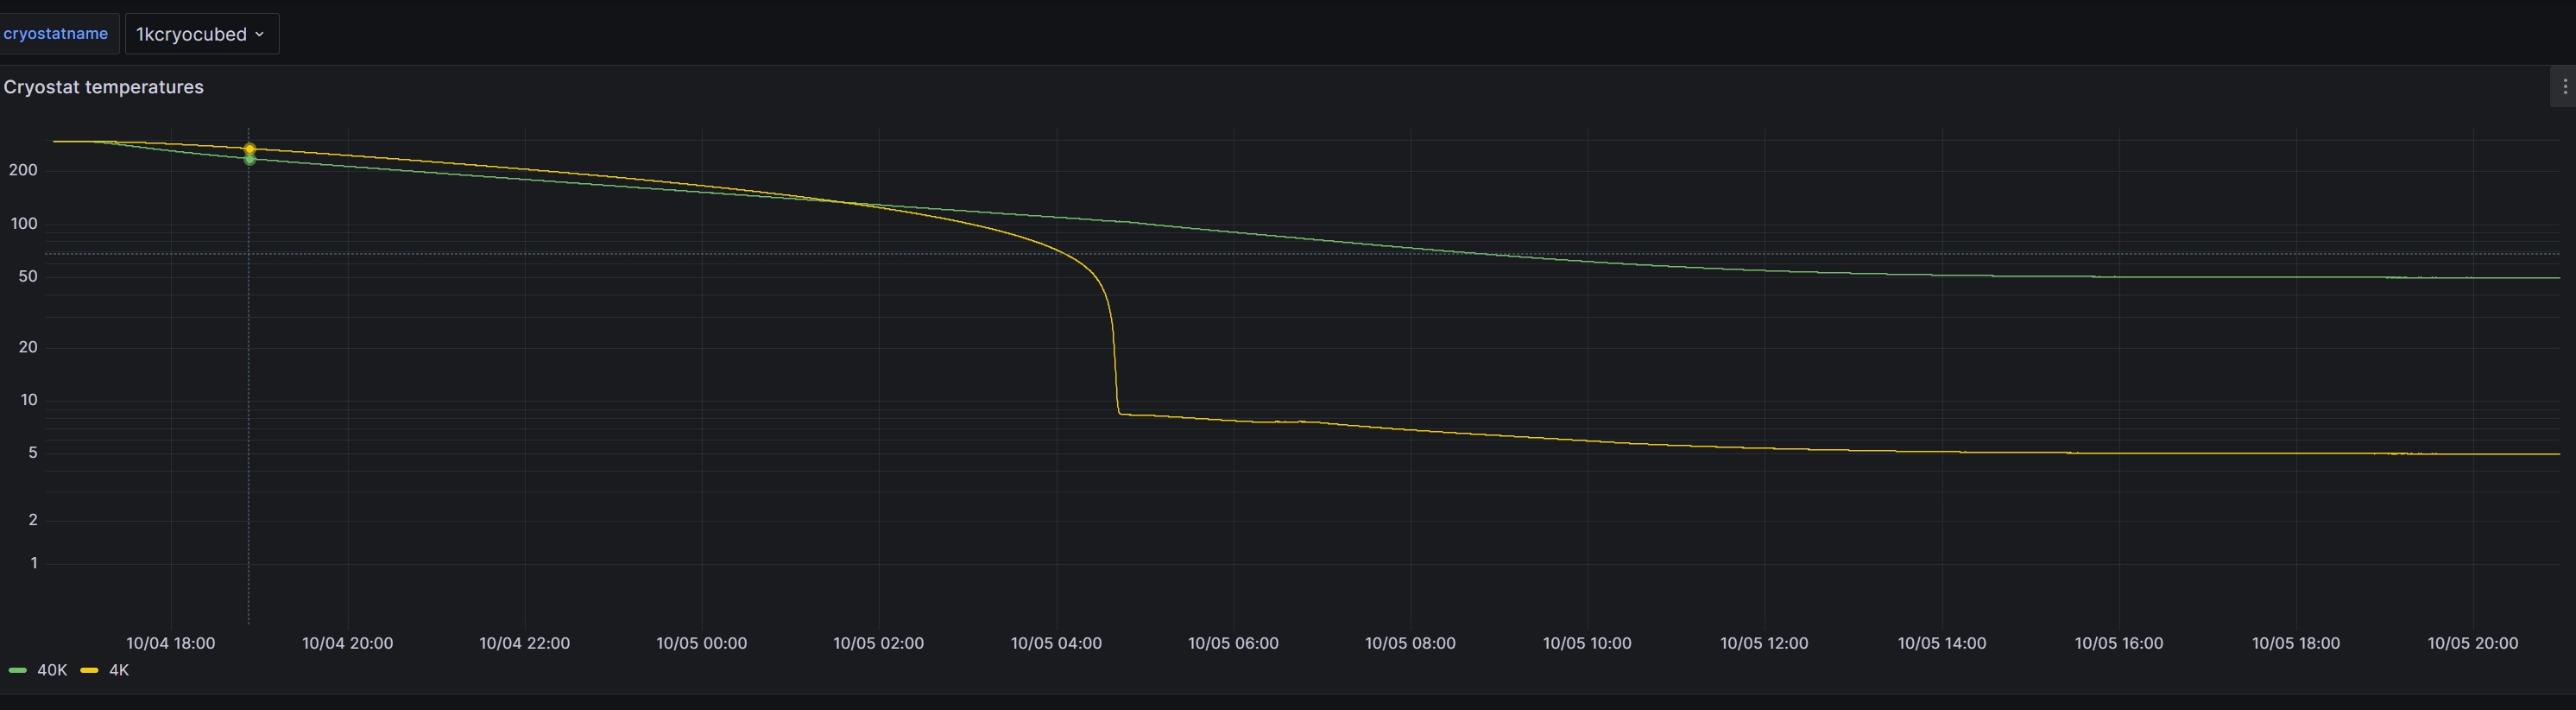
- https://amccaugh.com:3000/d/be7353b2-6c95-4f72-aa14-aba37e2b253c/cryostats?orgId=1&var-cryostatname=1kcryocubed&from=1723509904808&to=1723568367805
- Time for 4K to drop to 7.8K ~ 11 hours
- Time for 40K to hit 40K ~ 14 hours
- Lowest 40K temperature 37.7K ~ 14.5 hours
- Lowest 4K temperature 4.72K ~ 15.5 hours
After sitting for 1+ week in vacuum
Adding PCB Black body shields to 40K and 4K walls
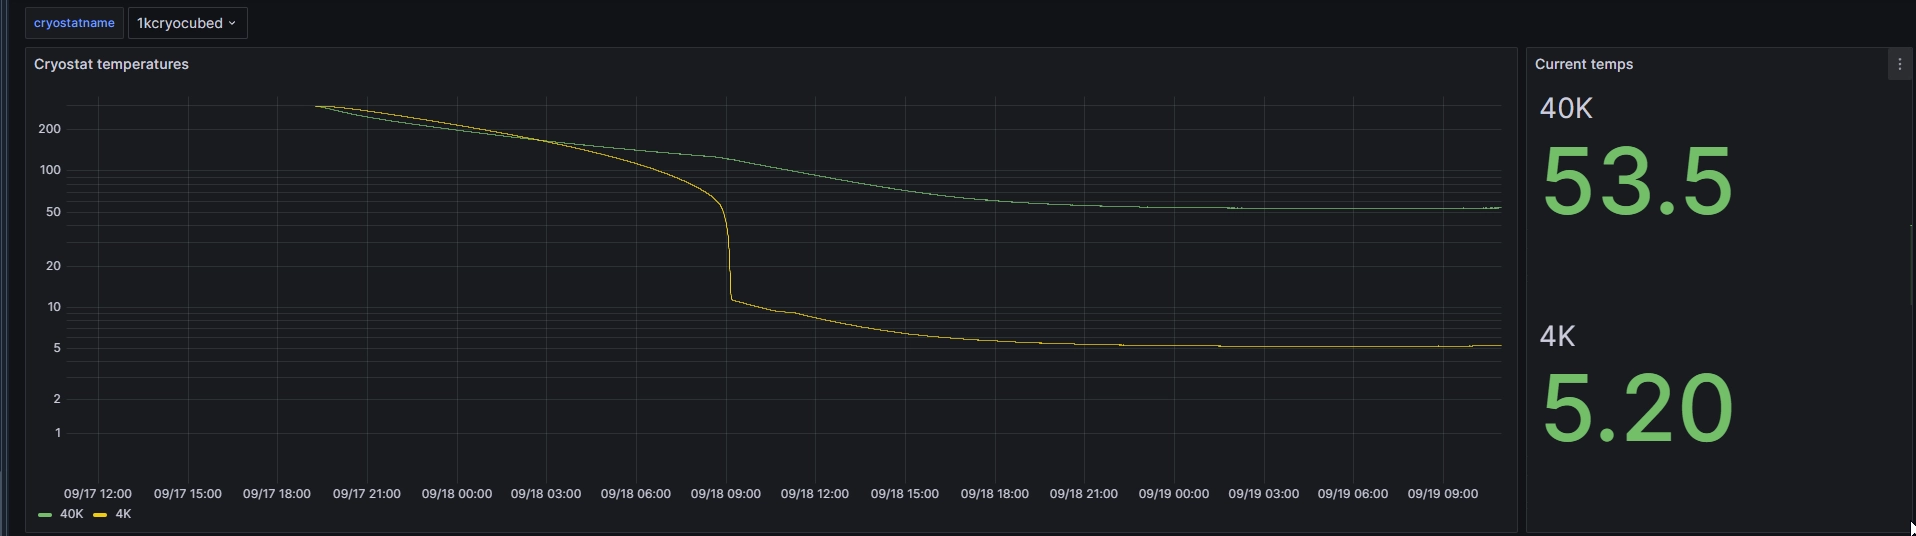
Start time: 19:15
Lowest temperature achieved:
- 40K = 53.3K @ 32hrs (3:00 time stamp after 24 hours from start)
- 4K = 5.17K @ 32 hrs (3:00 time stamp after 24 hours from start)
Trimming PCBs so they dont touch screws also added additional 40K strap (8 total now)
Start time: 16:30 (7.5 hours before 0:00)
Lowest temperature achieved:
- 40K = 49K @ 24 hrs (16:19)
- 4K = 5.0K @ 25 hrs (17:24)
Adding BB shields to idealvac walls
 https://amccaugh.com:3000/d/be7353b2-6c95-4f72-aa14-aba37e2b253c/cryostats?orgId=1&var-cryostatname=1kcryocubed&from=1728081291066&to=1728183498476
Start time: 17:00 (7 hours before 0:00)
Lowest temperature achieved:
- 40K = 50.4K @ 24 hrs (18:52)
- 4K = 5.06K @ 25 hrs (18:55)
Adding the BB shields to the idealvac walls in additional to the 40K box seems to have no benefit.
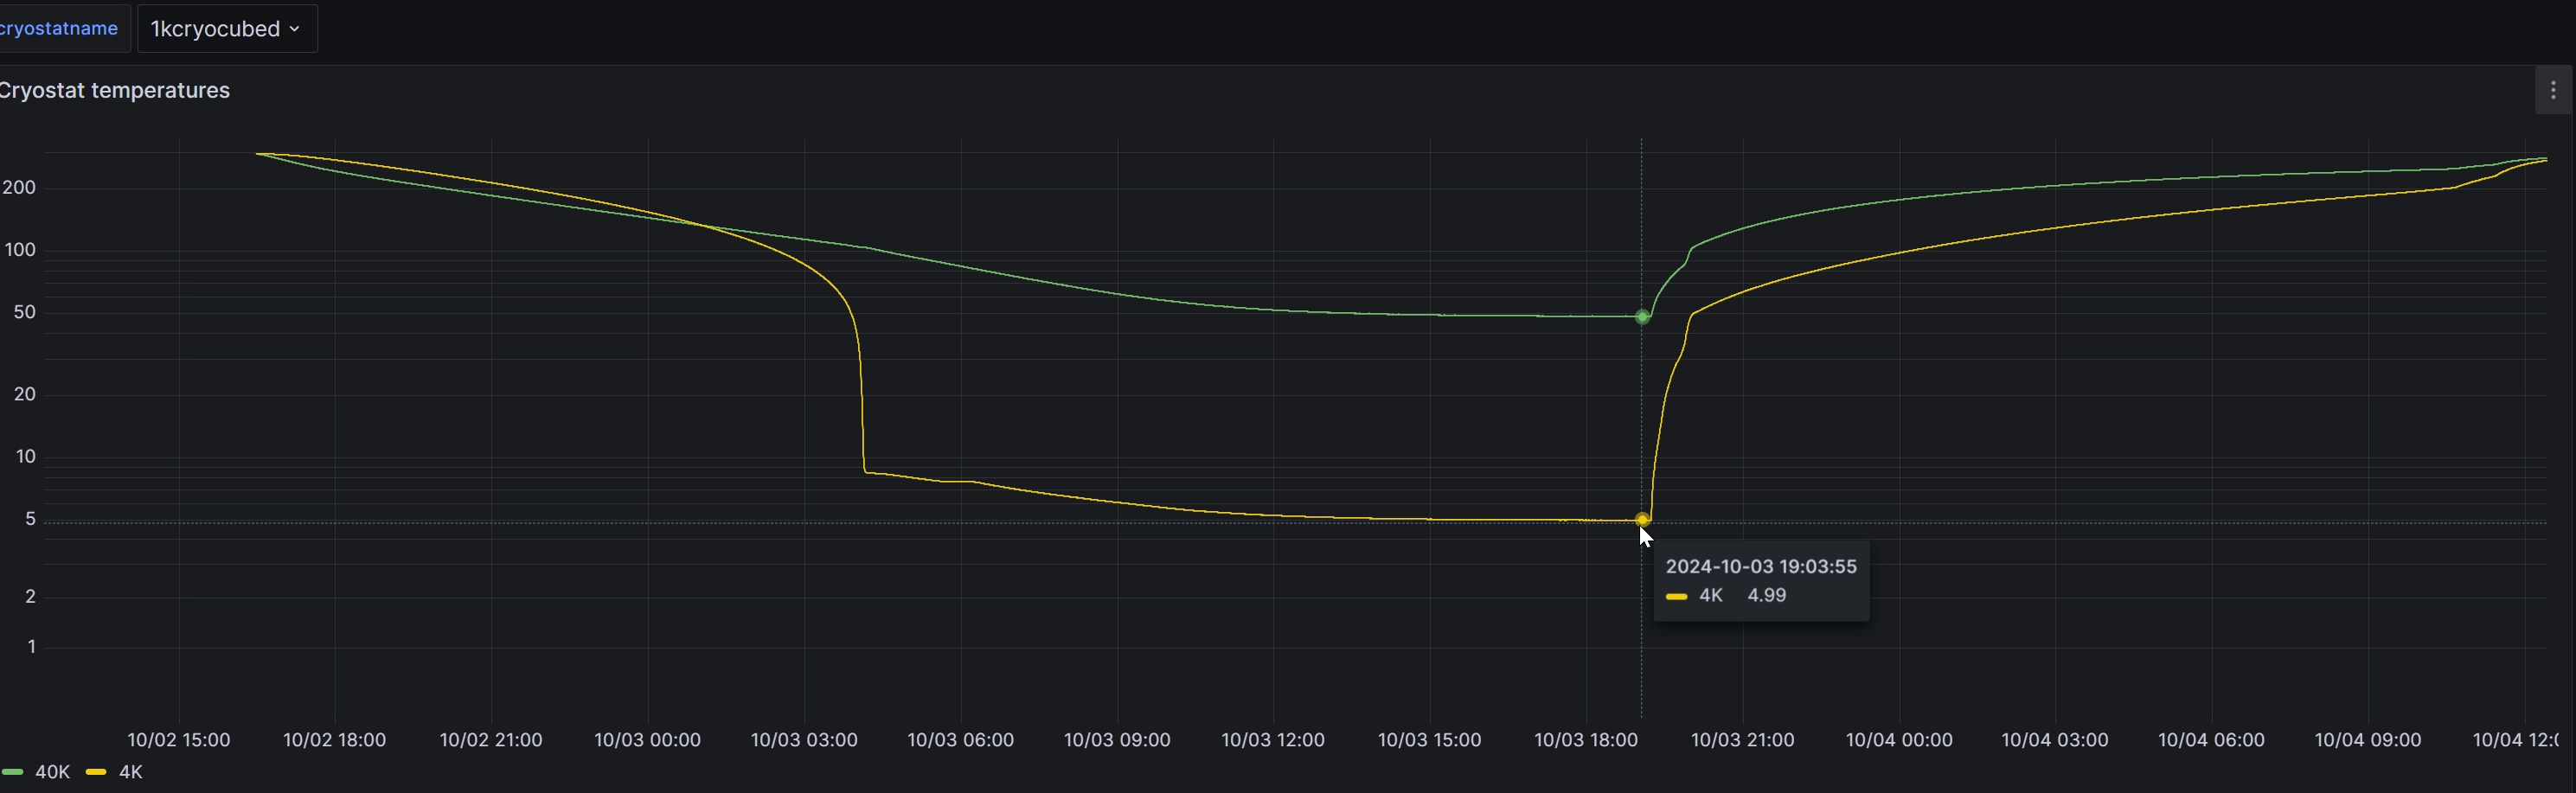
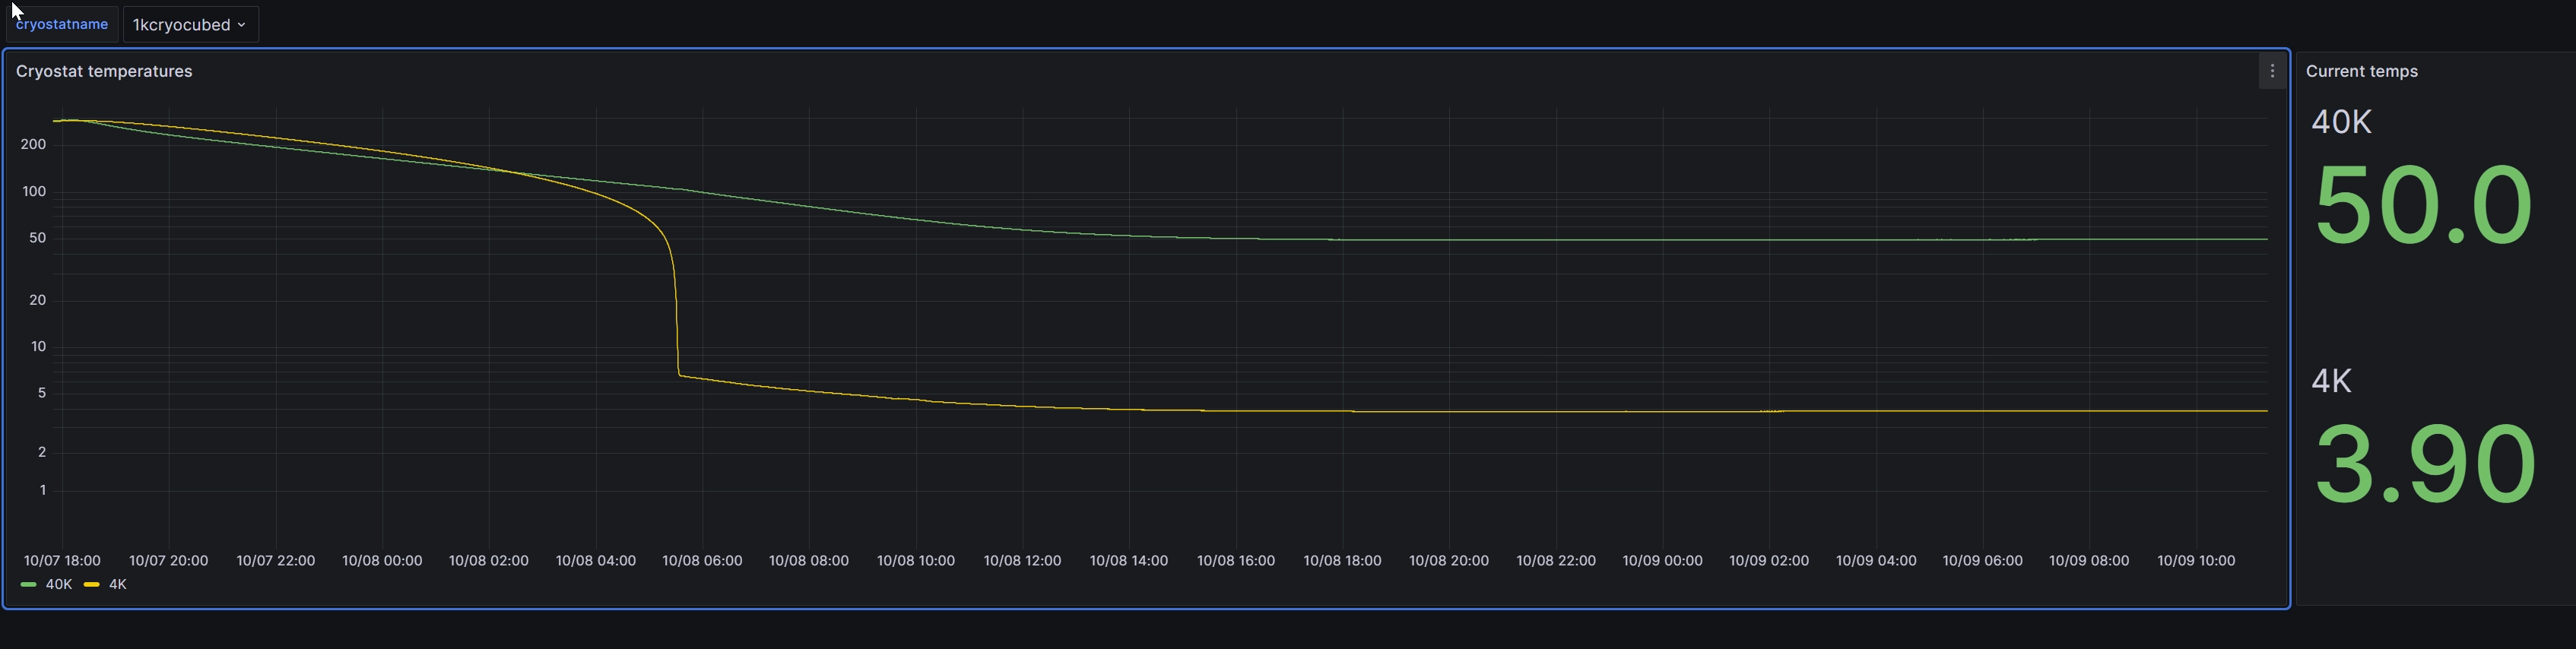
Removing PEEK screw from 4K to 40K
 https://amccaugh.com:3000/d/be7353b2-6c95-4f72-aa14-aba37e2b253c/cryostats?orgId=1&var-cryostatname=1kcryocubed&from=1728344938760&to=1728494396227
Start time: 18:00 (6 hours before 0:00)
Lowest temperature achieved:
- 40K = 50.3K @ 23 hrs (17:00)
- 4K = 3.89K @ 23 hrs (17:00)
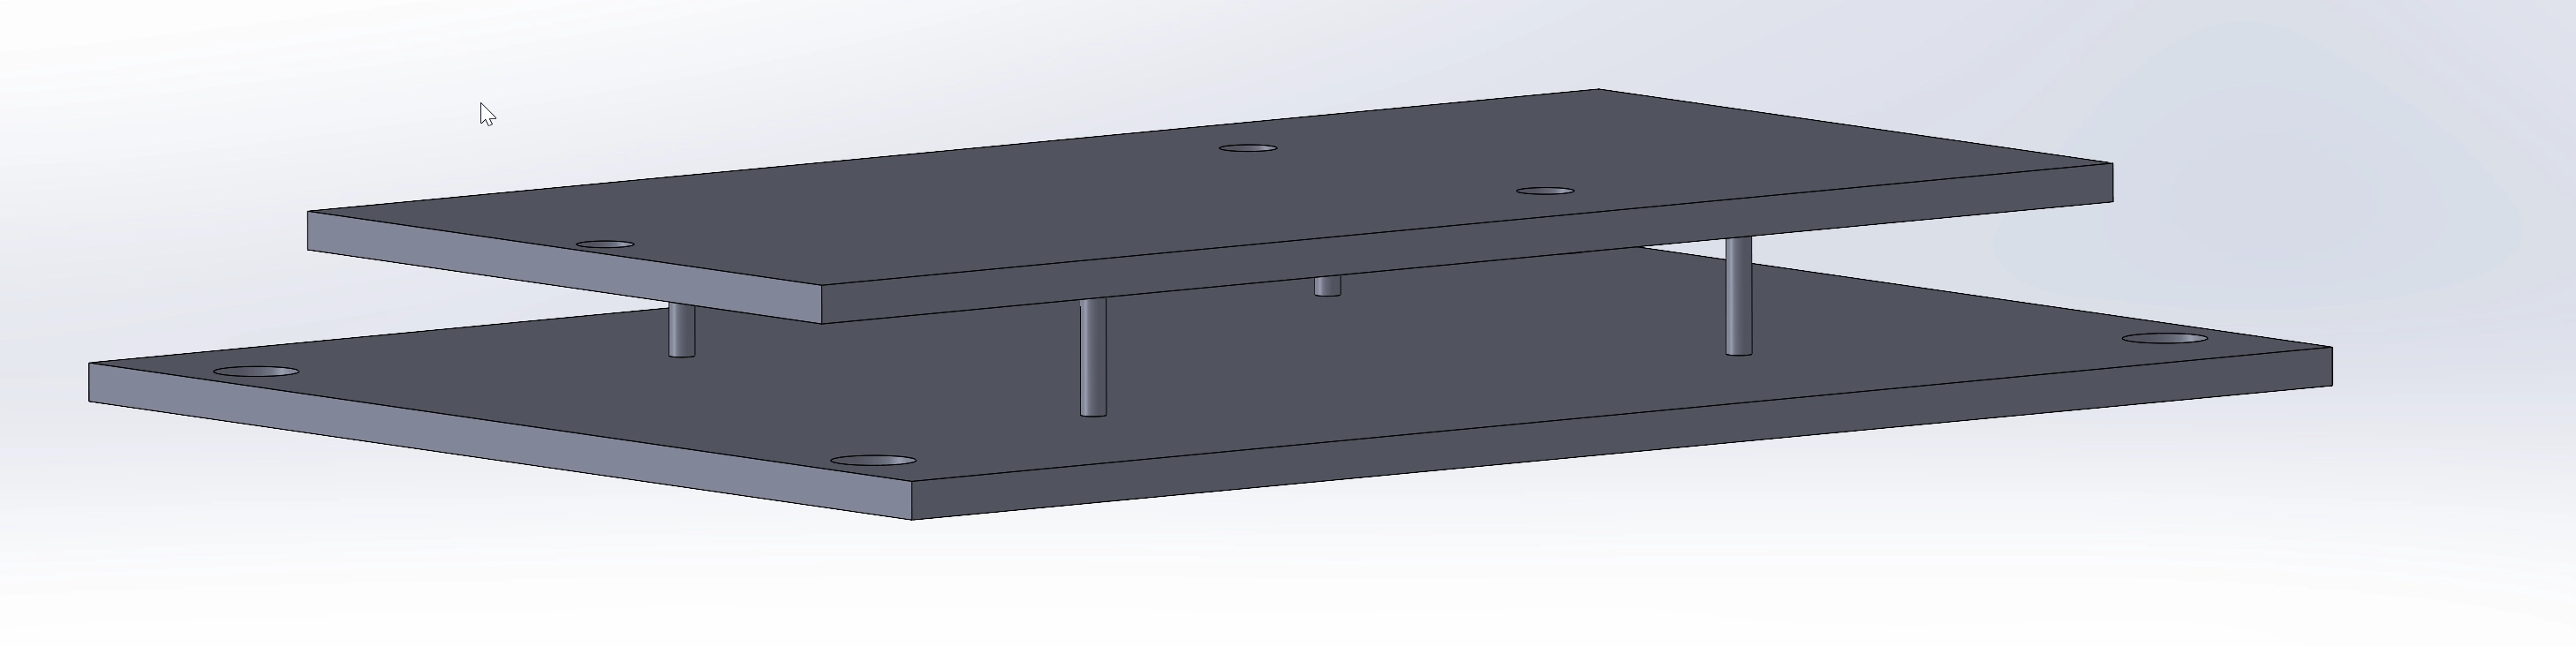
Using PLA 3D print between 40Kand 300K
https://amccaugh.com:3000/d/be7353b2-6c95-4f72-aa14-aba37e2b253c/cryostats?orgId=1&var-cryostatname=1kcryocubed&from=1728692399113&to=1728806649988
Start time: 19:00 (5 hours before 0:00)
Lowest temperature achieved:
- 40K = 53K @ 23 hrs (22:00)
- 4K = 3.72K @ 25 hrs (22:00)

Adding Laser cut DIY adhesive Mylar to bottom 3D print and idealvac wall.
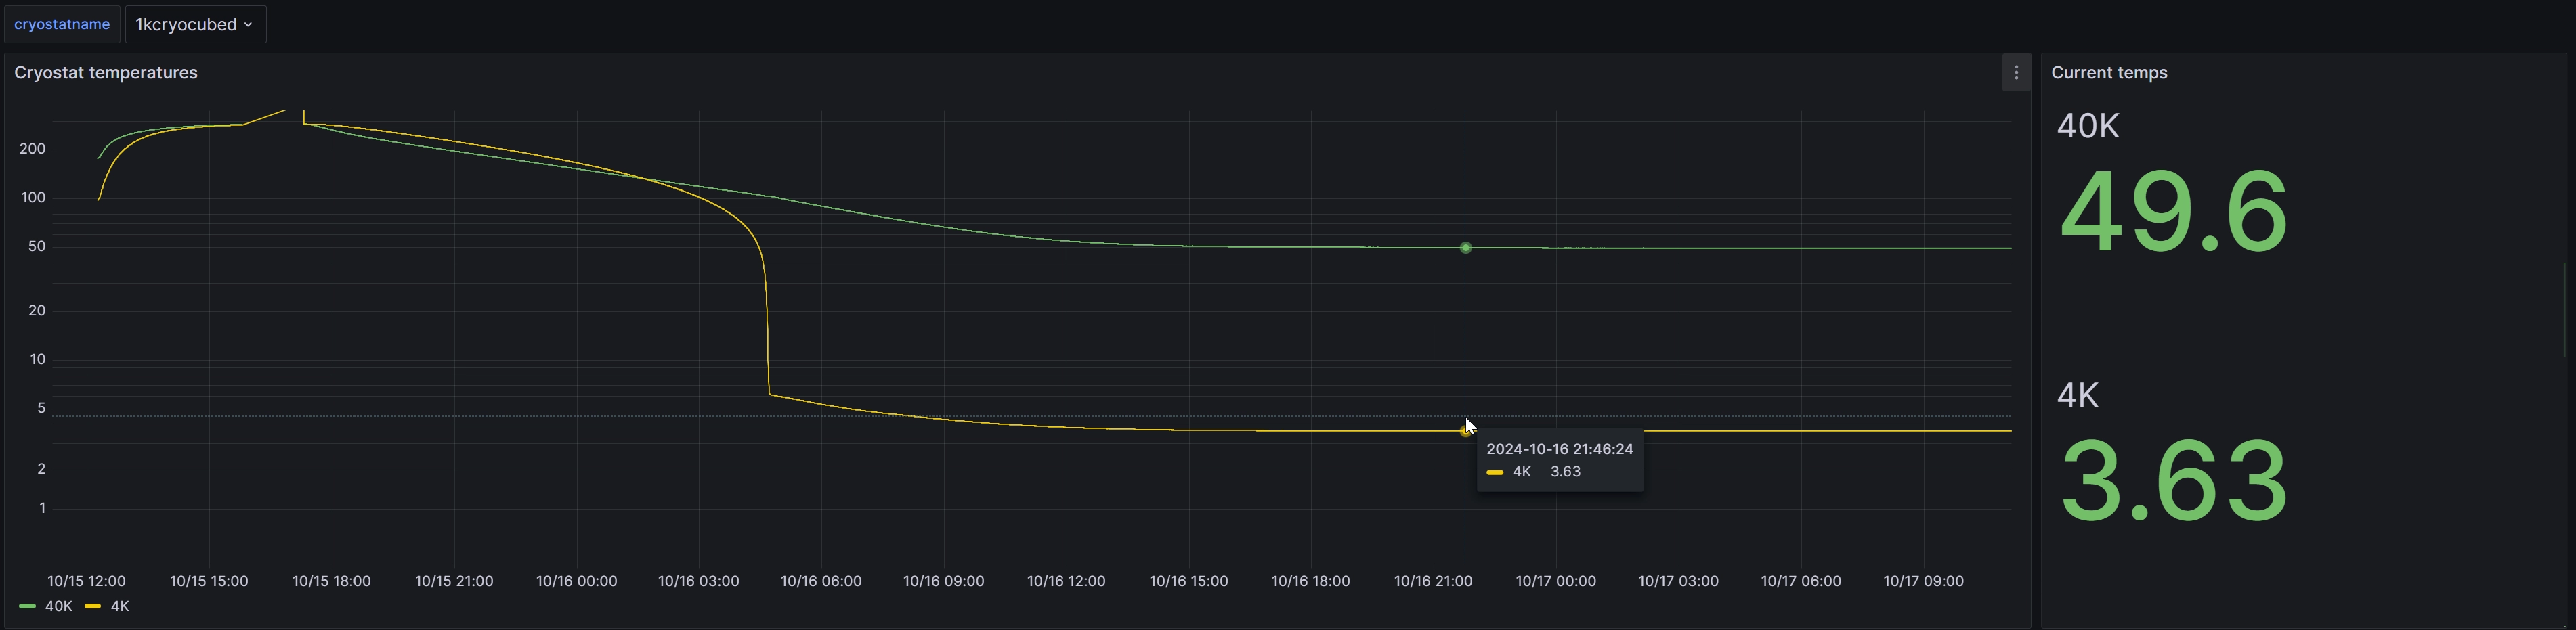
https://amccaugh.com:3000/d/be7353b2-6c95-4f72-aa14-aba37e2b253c/cryostats?orgId=1&var-cryostatname=1kcryocubed&from=1729032163792&to=1729182697367
Start time: 17:15 (6.75 hours before 0:00)
Lowest temperature achieved:
- 40K = 50.3K @ 25.75 hrs (19:00)
- 4K = 3.63K @ 25.75 hrs (19:00)
Transclude of 3Dprint_mylar_cutout.dxf
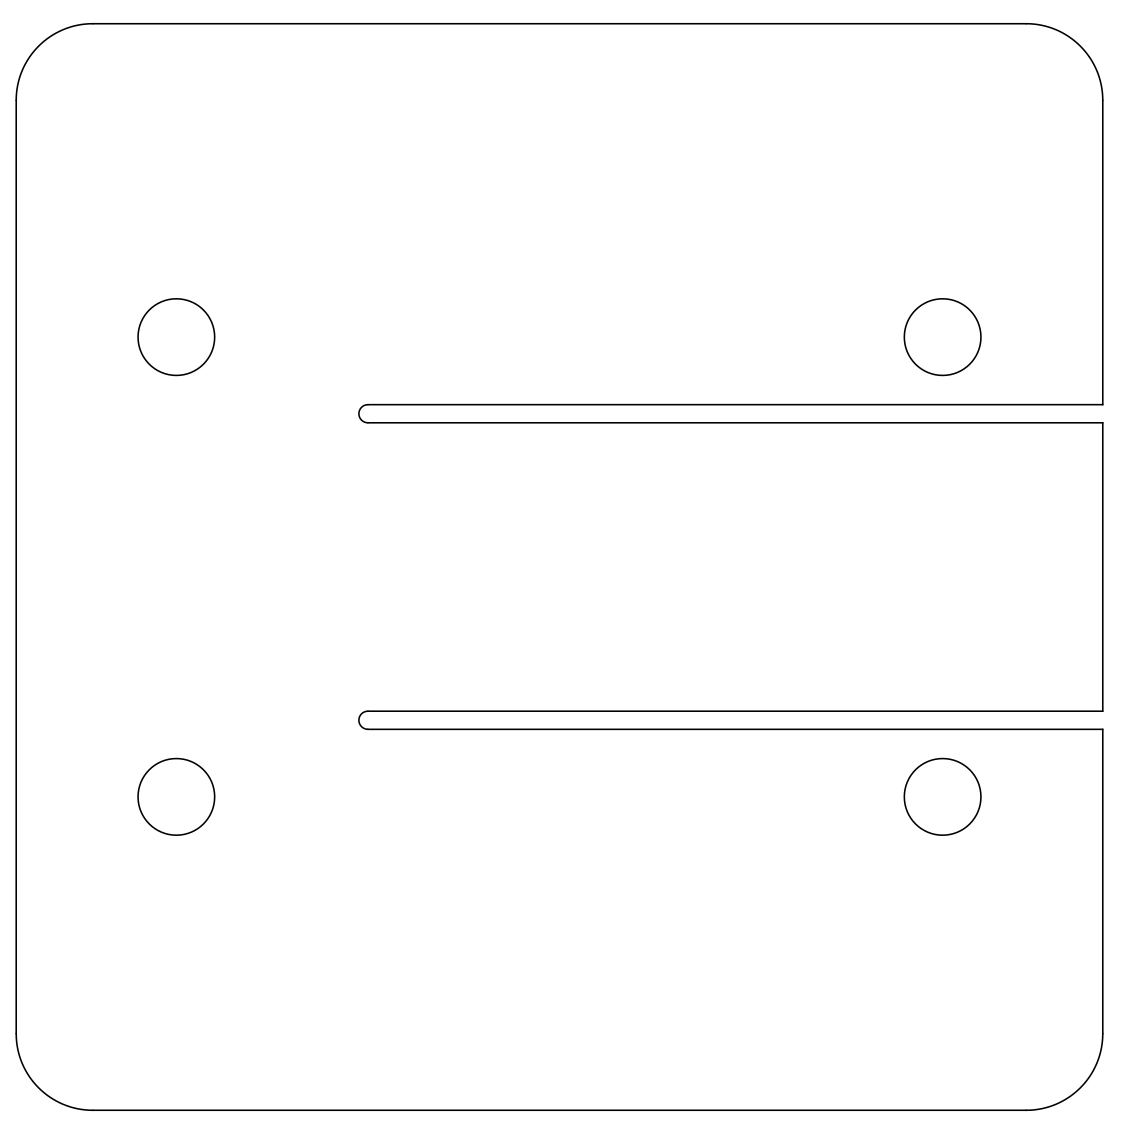
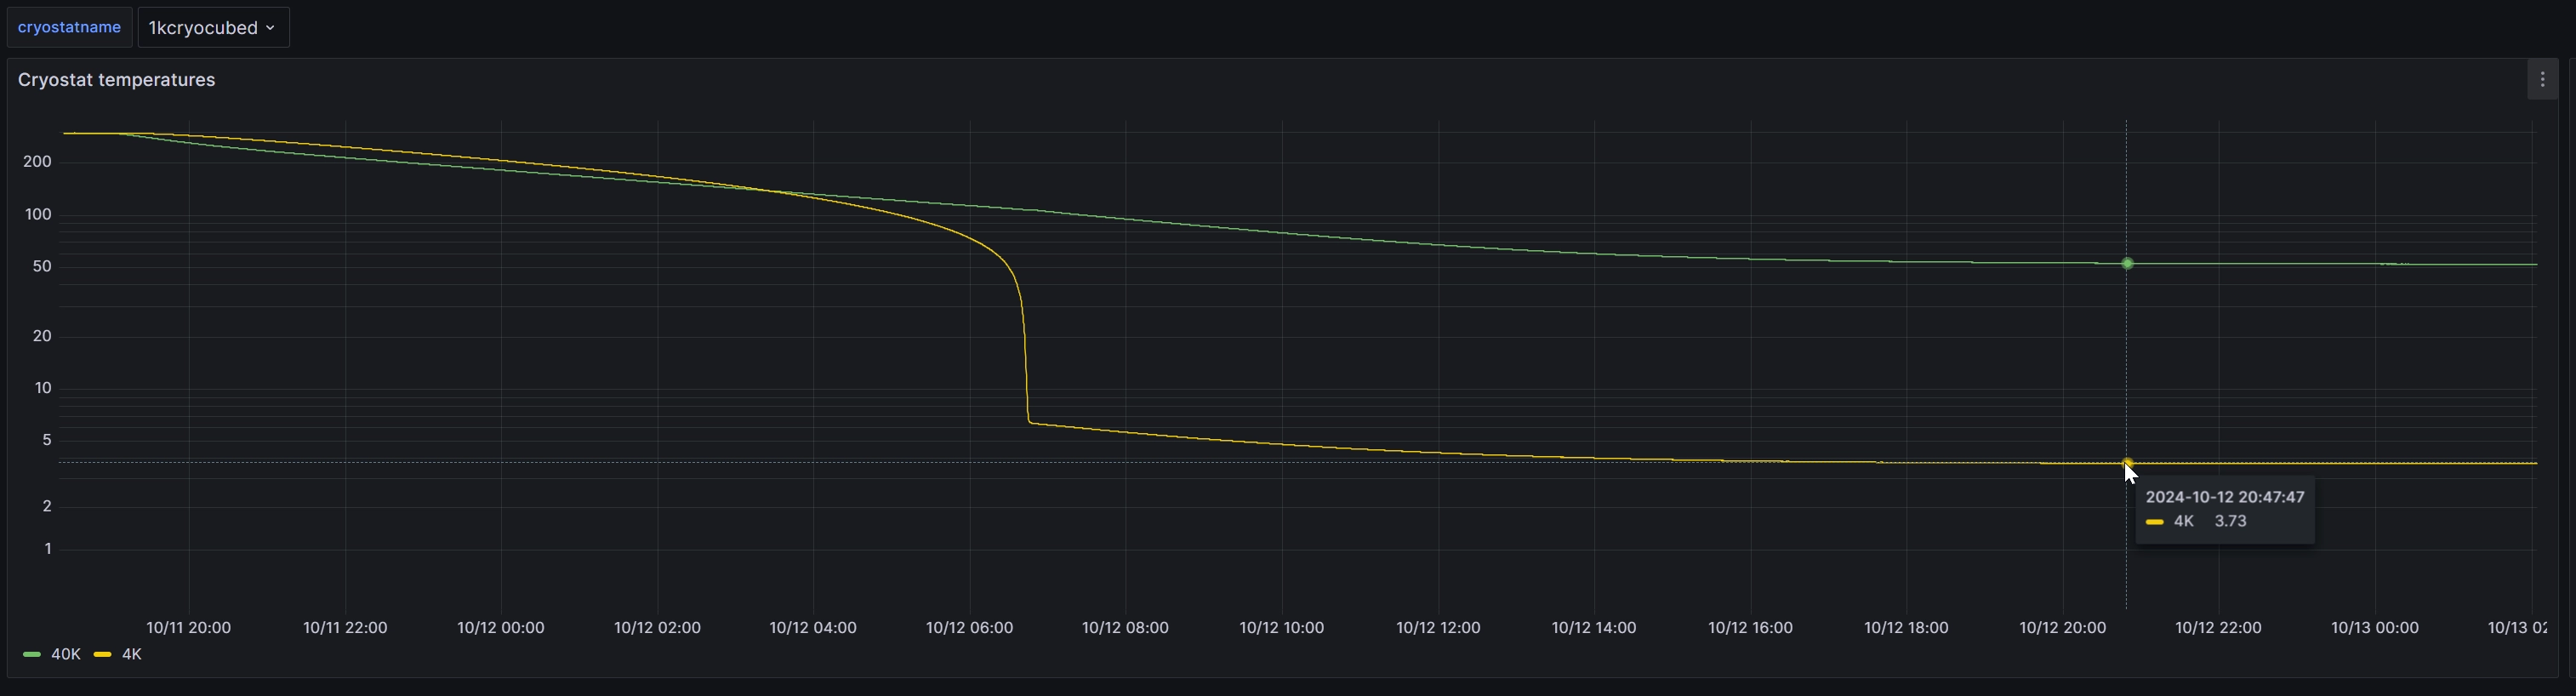
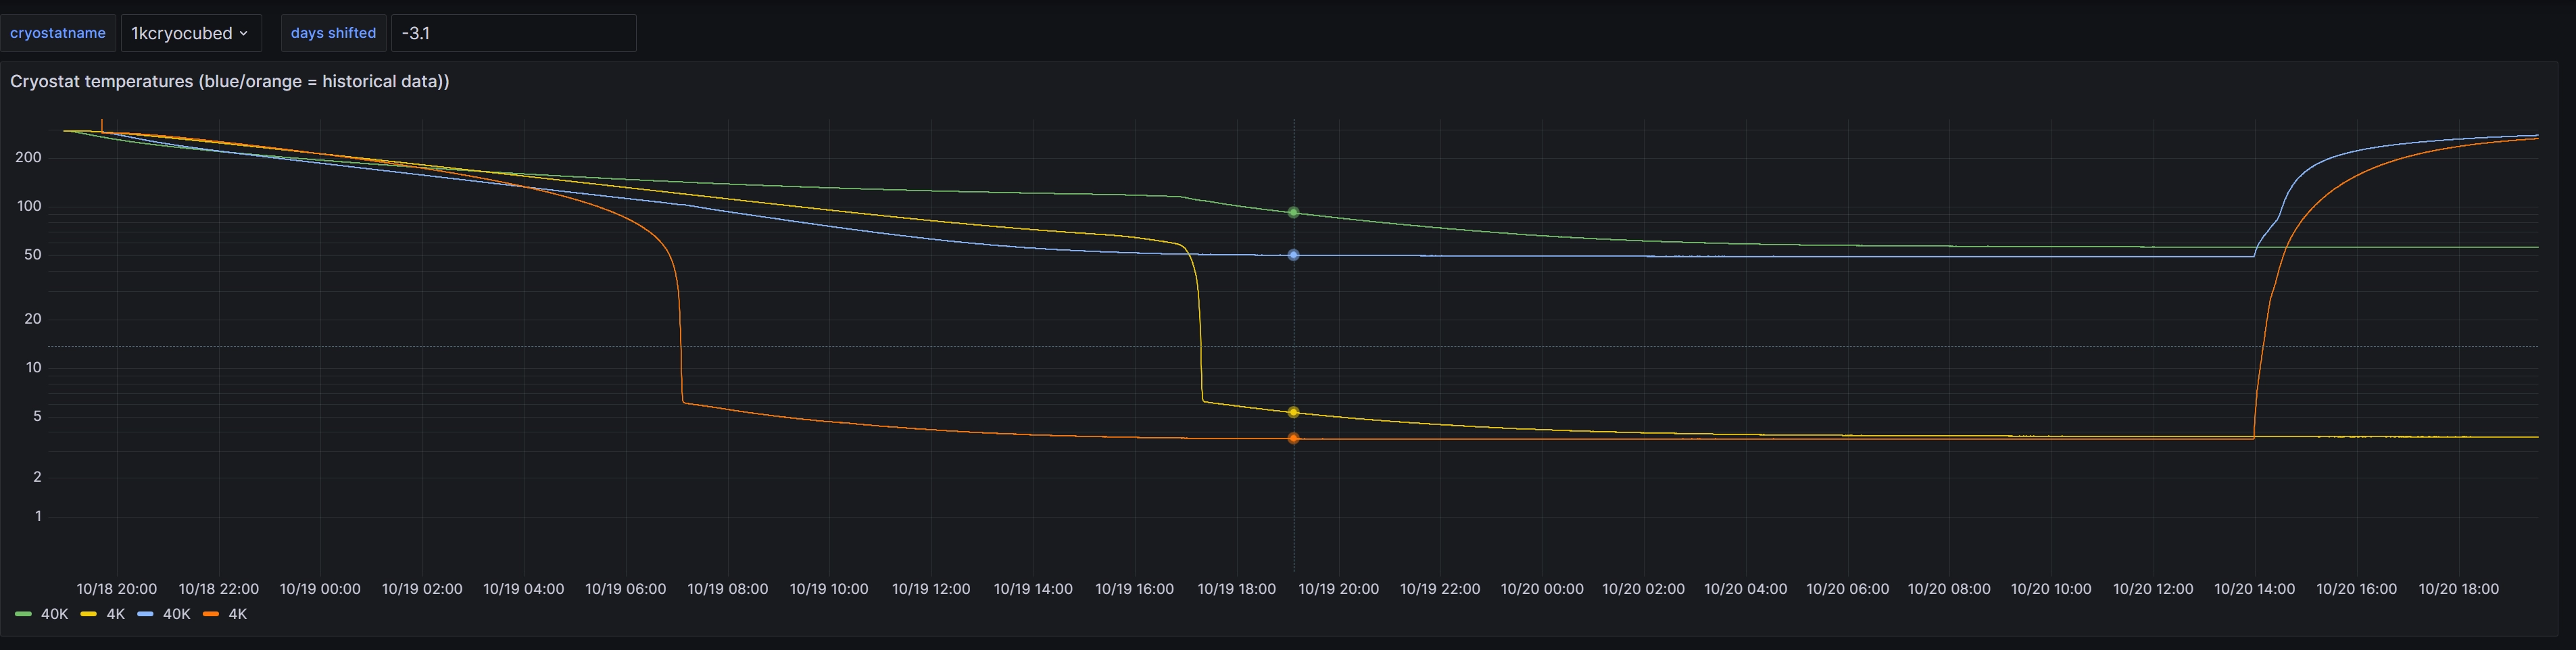
Removed Mylar and changed 3D print to increase thermal resistance
 When Installing the 3d print, it could not take a lot of force vertically. The arms were flexible and would bend down when vertical force was applied. This lead me to believe this cooldown test could have thermal shorts of some sort that were not intended.
I believe this wis why the 40K took longer to cooldown, which resulted in the 4K also taking longer to cooldown.
Adding 3D print between 40K and 4K stage
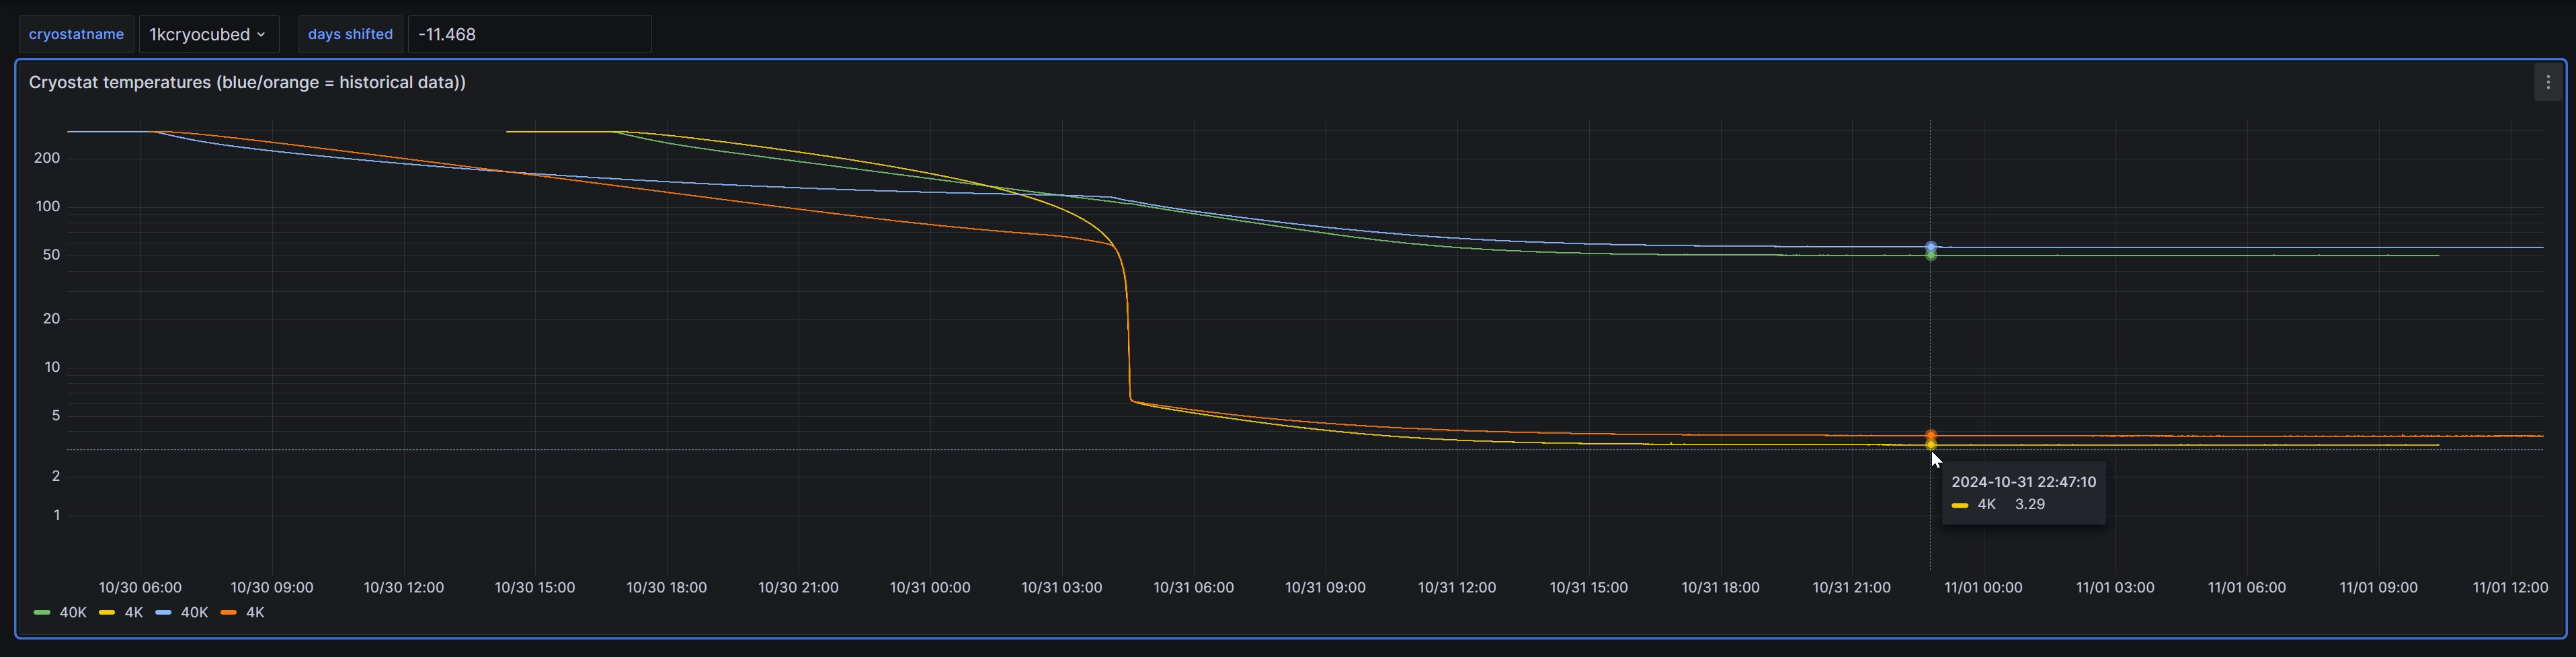
Start time: 17:00 (7 hours before 0:00)
Lowest temperature achieved:
- 40K = 50.3K @ 30 hrs (23:00)
- 4K = 3.29K @ 30 hrs (23:00)
Updated 3D print between 300K→40K & 40K & 4K. Mylar between both prints
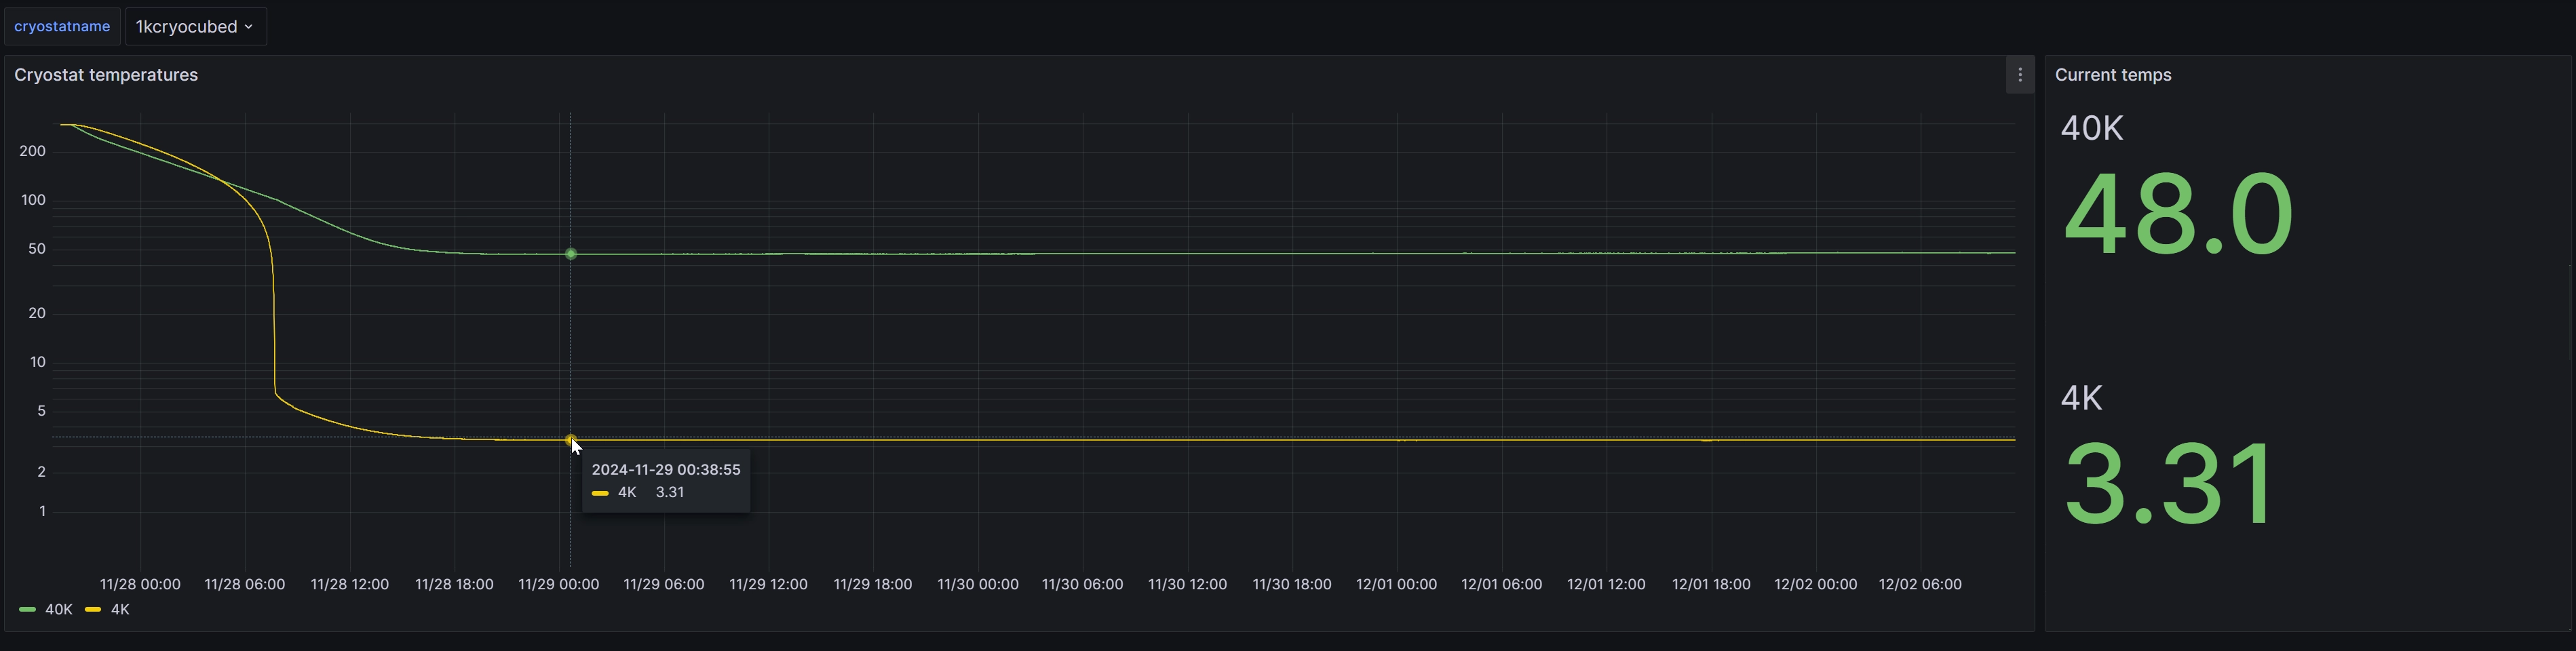 https://amccaugh.com:3000/d/be7353b2-6c95-4f72-aa14-aba37e2b253c/cryostats?orgId=1&var-cryostatname=1kcryocubed&from=1732759033863&to=1733163812192
Start time: 20:00 (4 hours before 0:00)
Lowest temperature achieved:
- 40K = 48K @ 22 hrs (18:00)
- 4K = 3.32K @ 25 hrs (21:00)